Overview
This article shares information about adding DNS records such as DKIM and DMARC to Kerio Connect for protecting and securing your domain. The procedure covers adding DKIM and DMARC records and confirming the successful configuration using various platforms and methods.
Prerequisites
Access to the Kerio Connect Webadmin.
Access to the DNS Administration console.
Adding DKIM and DMARC Records
- Log in to the Kerio Connect Webadmin.
- Go to Open Configuration > Domains.
- Double-click on the necessary domain and, under the DomainKeys Identified Mail (DKIM) section, check the Sign outgoing messages from this domain with DKIM signature option.
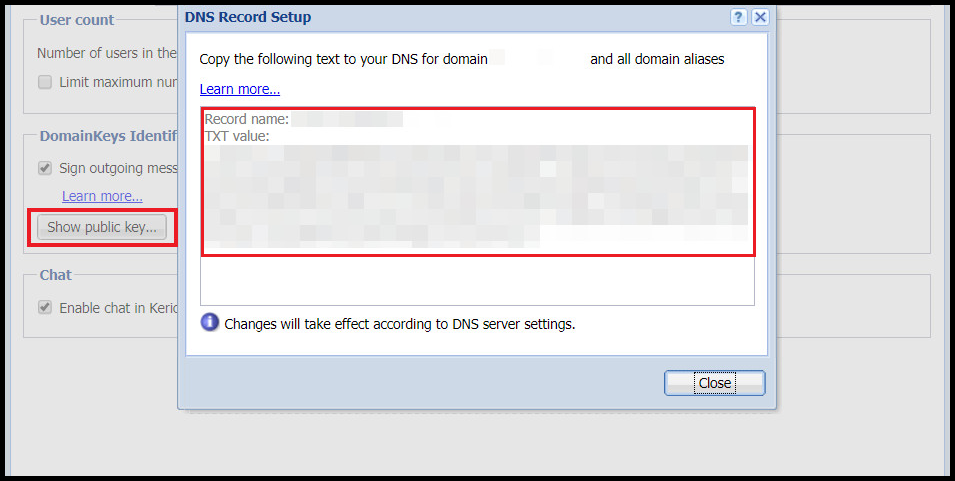
- Click on the Show public key... button and copy both the Record name and the TXT value.
Note: DKIM TXT value cannot be changed to a custom option, as it is hardcoded in the source code. Additionally, please note that Kerio Connect does not support the
c=relaxed/relaxedsetting. - Open your DNS Hosting Administration.
- Go to Your_Domain_Name > Manage records > Add TXT record.
- Paste both, the Record name and TXT value that you copied in step #4.
- For the DMARC record, you can choose to either
quarantineorrejectthe messages, as seen in the example screenshot below:


Testing
There are various ways to confirm if the DKIM/DMARC records were configured correctly. Refer to the sections below to learn more:
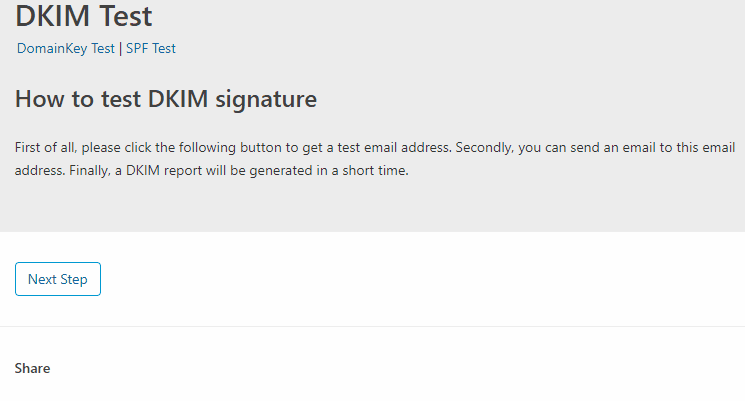
Appmaildev
- Open the Appmaildev website, and click on the Next Step button to generate a random email address.
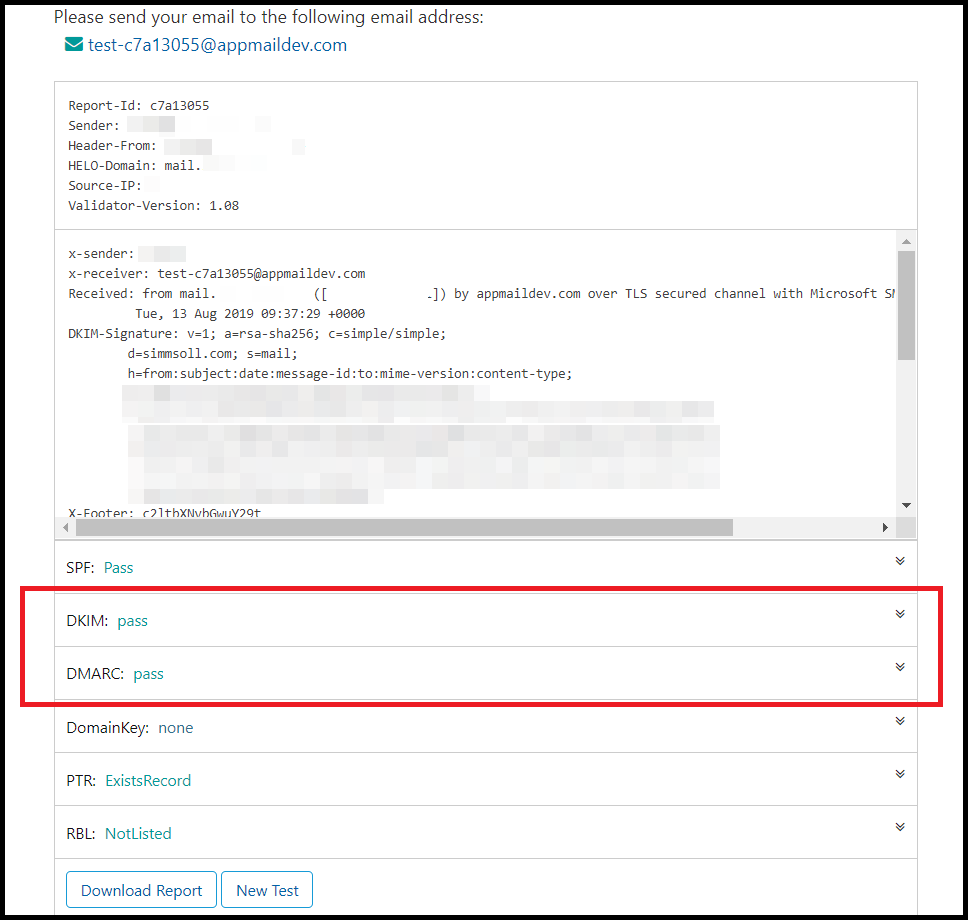
- Log in to your Webmail.
- Compose a new email and send it to the newly generated email address.
-
Confirmation: You receive a report like the following:
Mail-tester
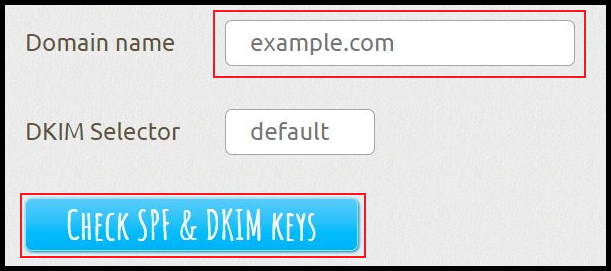
- Open the Mail-tester website and type in your Domain name.
- Click on the CHECK SPF & DKIM KEYS.
-
Confirmation: You receive a report like the following:

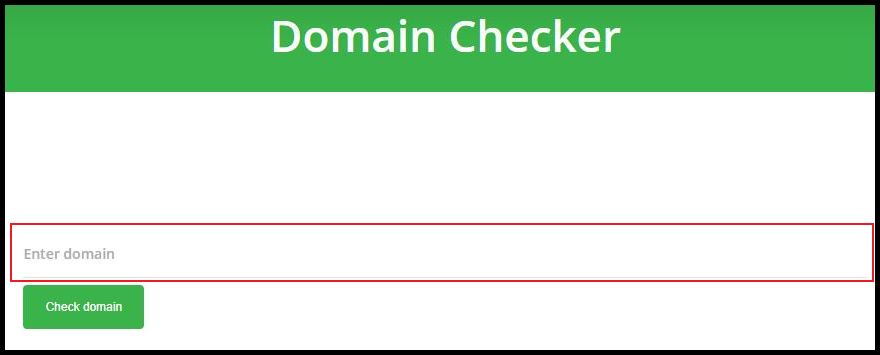
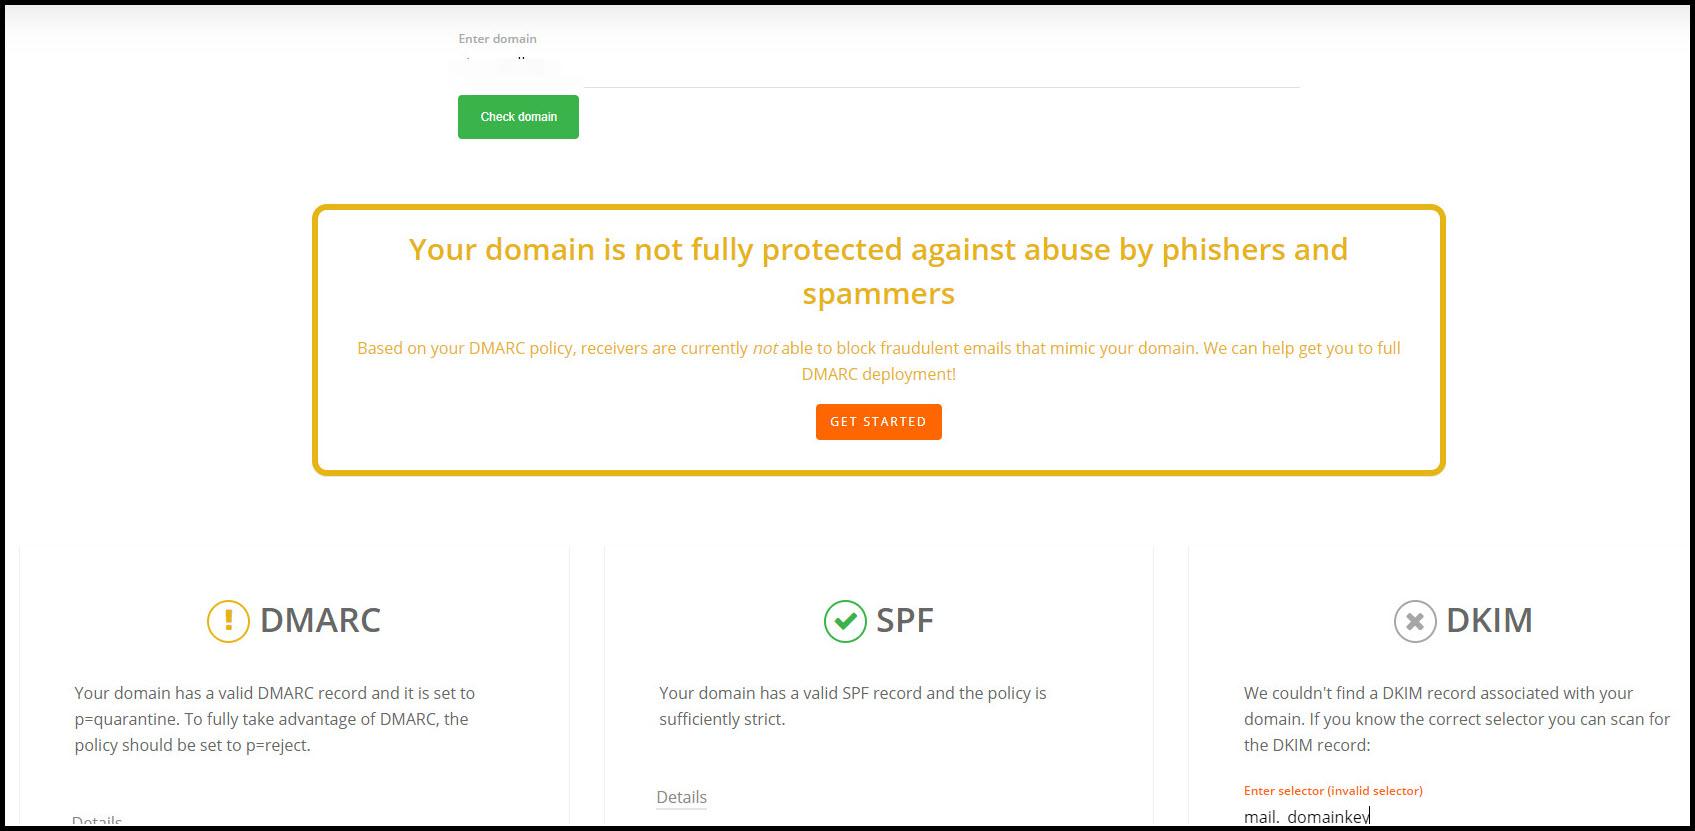
Dmarcian
- Go to the Dmarcian website and type your domain name.
- Click on the Check Domain button.
-
Confirmation: You receive a report like the following:
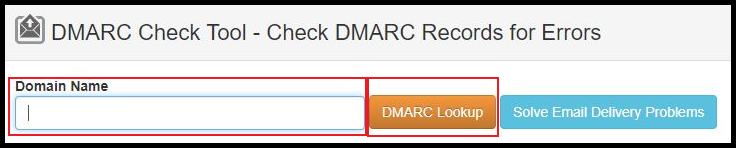
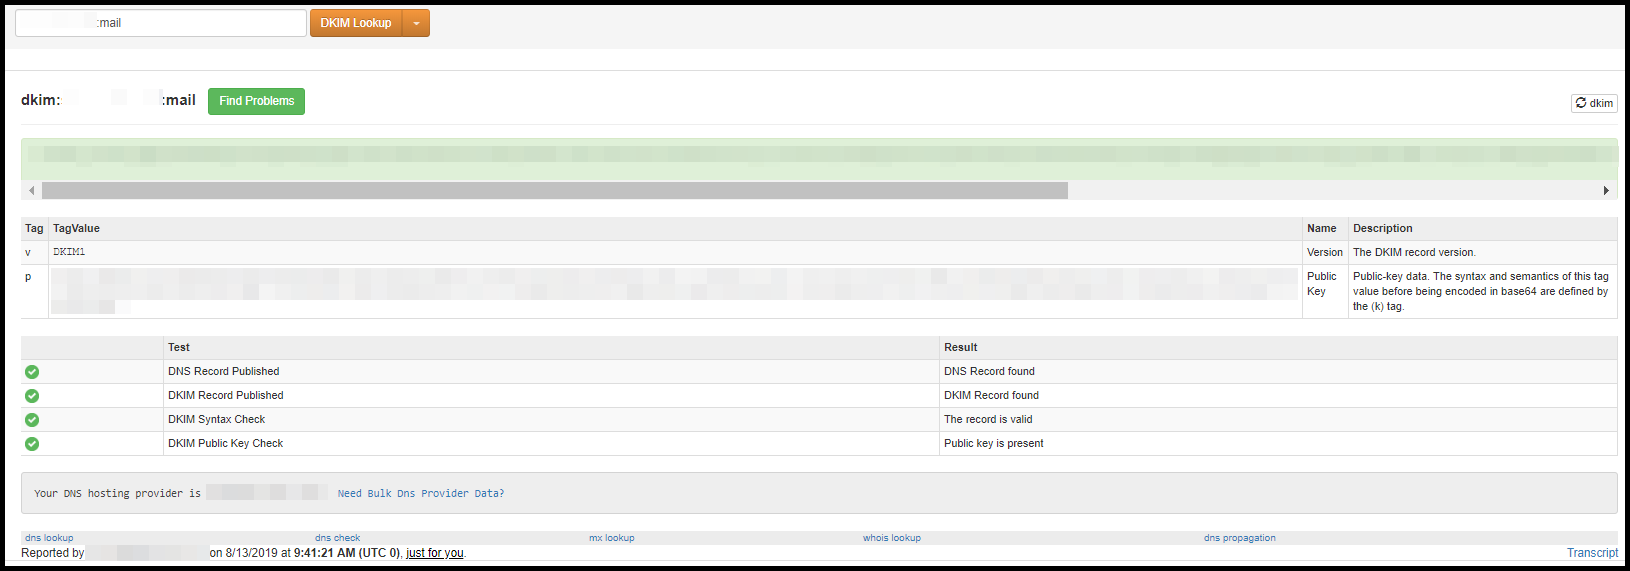
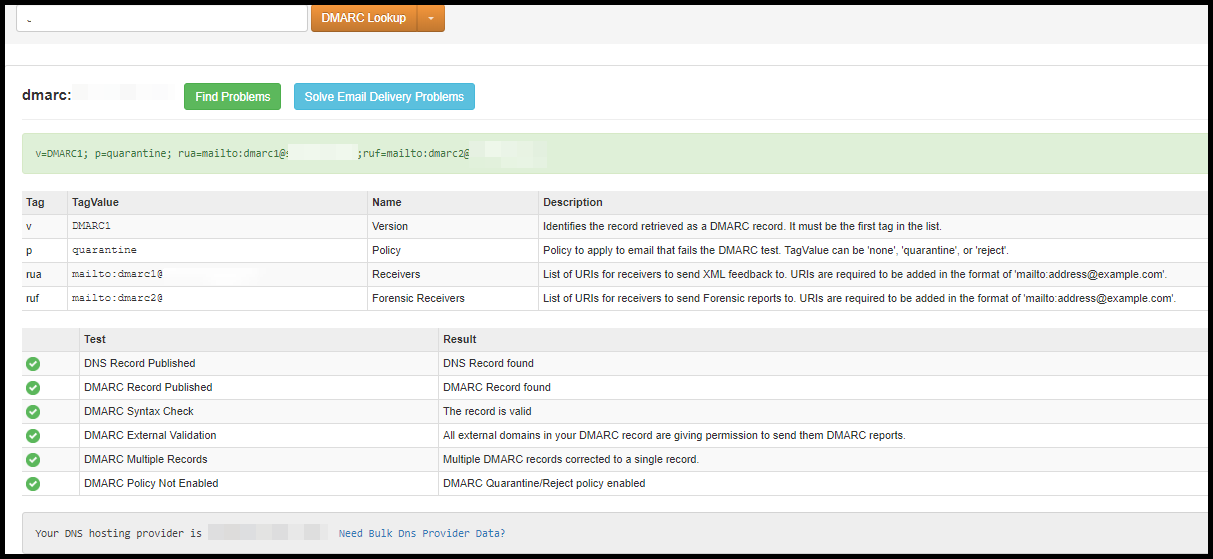
MxToolbox
- Go to the DKIM MxToolbox website or DMARC MxToolbox website and type in your domain.
- Click on the DKIM Lookup or DMARC Lookup button.
-
DKIM
-
DMARC
-
-
Confirmation: You receive a report like the following:
-
DKIM
-
DMARC
-

Further Reading About DKIM/DMARC
If you would like to learn more about DKIM/DMARC, please feel free to read the following articles:
Priyanka Bhotika
Comments