Overview
This article shares the process of installing Kerio Connect on the CentOS 7 operating system.
Note: This process was tested on the sub-version CentOS 7.6 and is expected to be the same for all higher sub-versions (7.7 and above).
Prerequisites
- Install CentOS 7 (subversion 7.6 or above) using the official step-by-step guide.
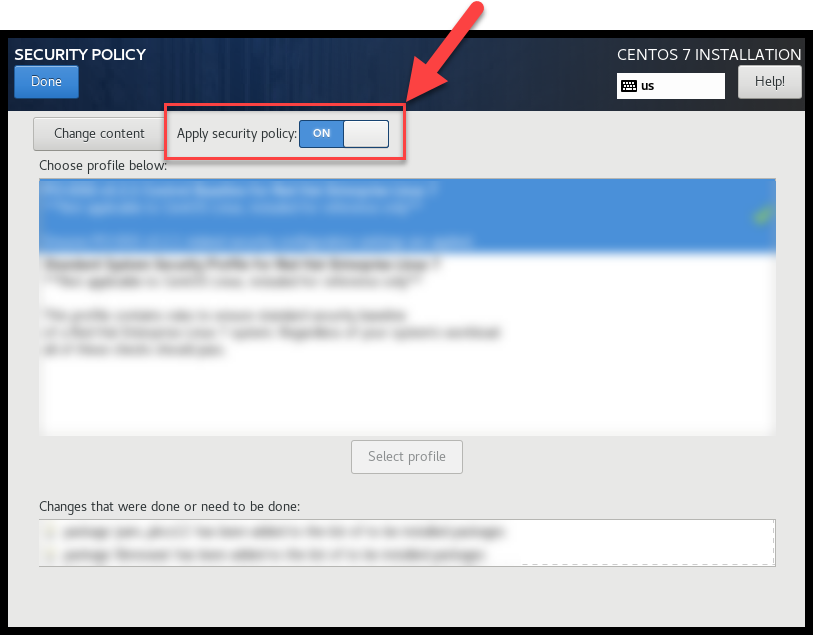
- Enable the Apple security policy in the process, as shown below:
Process
Follow these steps:
- Download the latest version of Kerio Connect for RPM-based systems. You can also use the WGET tool to download.
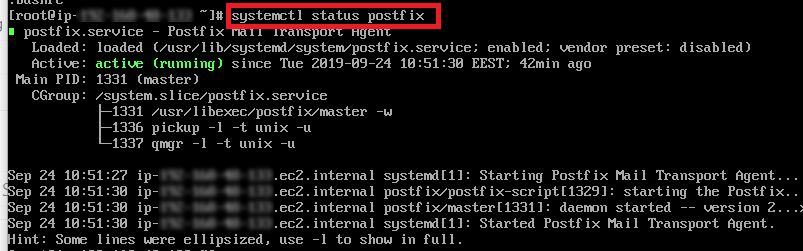
- Check the status of postfix using the command
systemctl postfix statusas shown in the screenshot below:
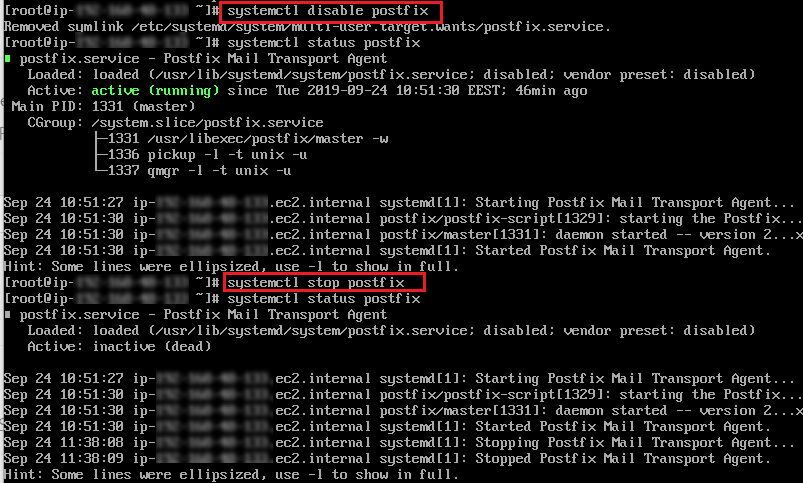
- Use the following commands to disable and stop the postfix service to the Kerio Connect installation without interference:
systemctl disable postfixsystemctl stop postfix
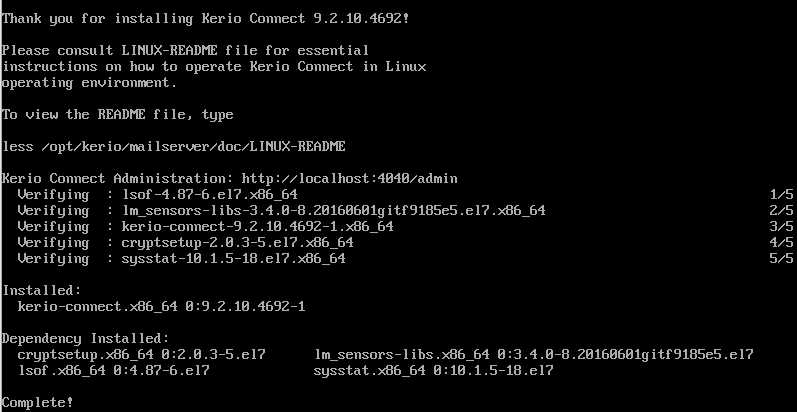
- Install Kerio Connect using the following command:
sudo yum install kerio-connect-9.2.10-4692-linux-x86_64.rpm. Once the installation completes, an output similar to the following displays as the confirmation:
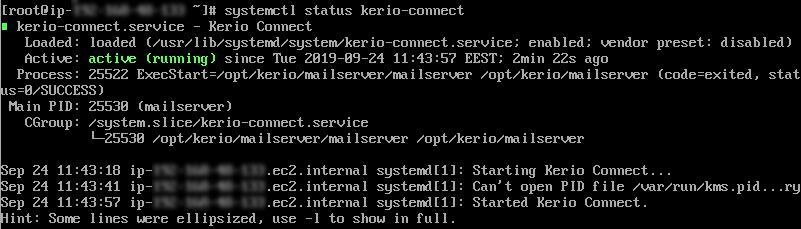
- Check the status of Kerio Connect service using the command:
systemctl status kerio-connect. If the installation is successful, the active status displays as Active (running), as seen in the screenshot below:
- Configure the CentOS firewall using the steps given below for allowing the remote administration (through port 4040) and protocols of Kerio Connect:
- Run this command to retrieve active zones:
firewall-cmd --get-active-zones - The outcome lists your active zones (public, DMZ, etc.). Run the following command for each active zone:
firewall-cmd --zone=public --add-port=4040/tcp --permanent
Note: This command is an example when the zone is public. Replace the zone value and run this command for all active zones.
- Reload the firewall for changes to take effect using this command:
firewall-cmd --reload
- Run this command to retrieve active zones:
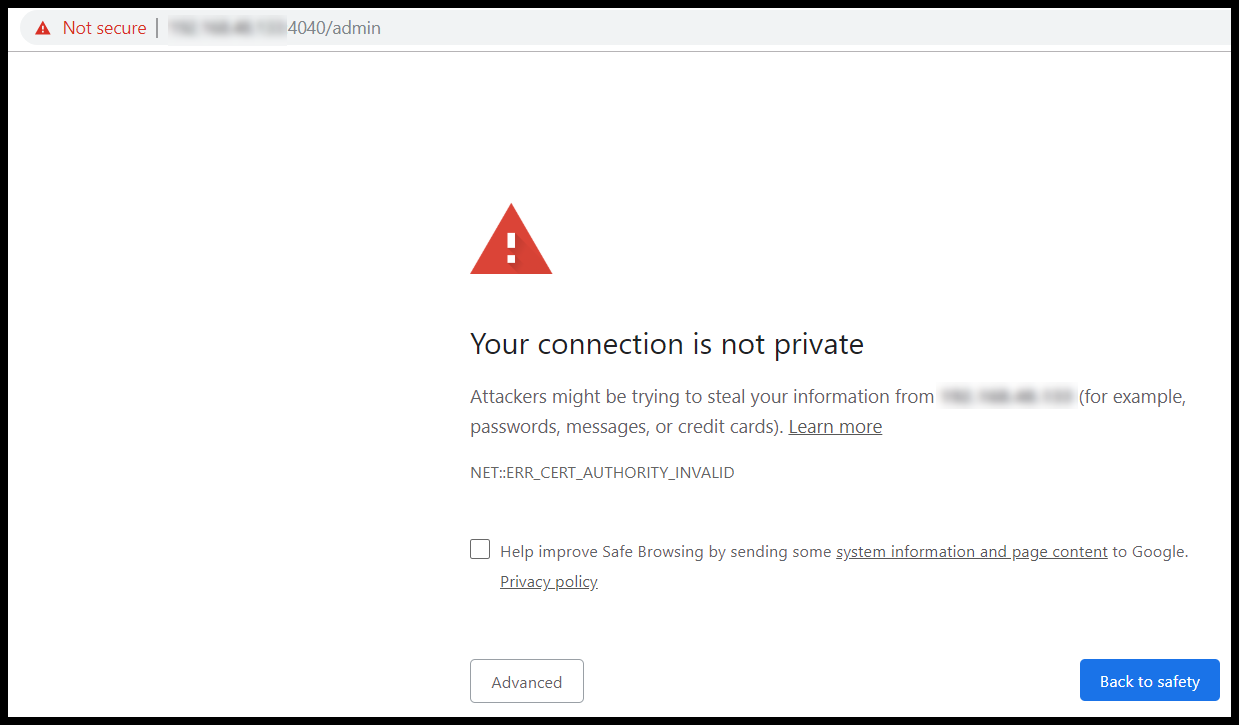
- Open the URL:
https://your_CentOS_IP:4040/admin. If this prompts you with the warning: Your connection is not private, click the Advanced button and proceed to the link.
- Follow the steps shared by the installation wizard to perform the initial configuration of Kerio Connect.

Confirmation
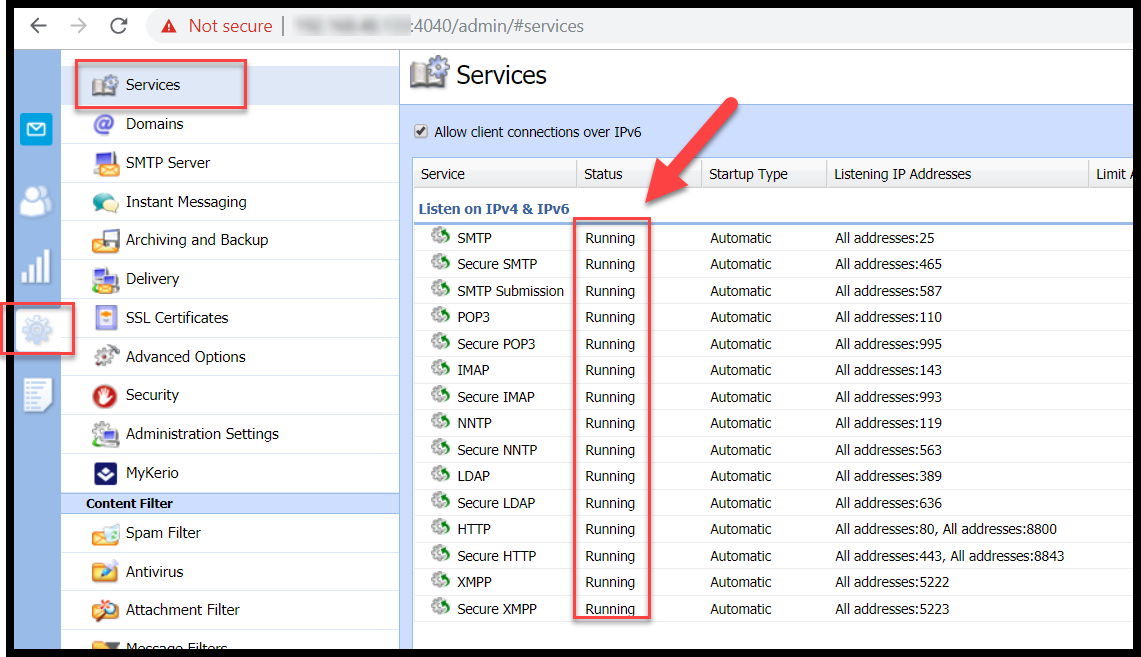
Successful completion of the installation can be verified by the following:
- Kerio Connect Webadmin portal loads successfully.
- Checking if the status of all services is running in the Kerio Connect portal, under Settings > Services, as shown in the screenshot below:
Priyanka Bhotika
Comments