Answer
About the Microsoft IIS SMTP service
The SMTP service is part of Microsoft IIS, which is part of Microsoft Windows 2000 / 2003. It is used as the message transfer agent of Microsoft Exchange Server 2003, and has been designed to handle large amounts of email traffic. The Microsoft IIS SMTP service is included in every Microsoft Windows Server Distribution, as well as Microsoft Windows XP Professional.
-
From the Start menu, access the Control Panel
-
Open the Add or Remove Programs and click on the Add or Remove Windows Components
-
Click the Internet Information Services (IIS) component and click the Details button
-
Verify that the SMTP Service checkbox is selected. If it is not selected, click to select it
-
Click the OK button, and then follow the installation instructions that are displayed
-
From the Start menu, access the Administrative Tools
-
Click on the Internet Information Services (IIS) Manager icon
-
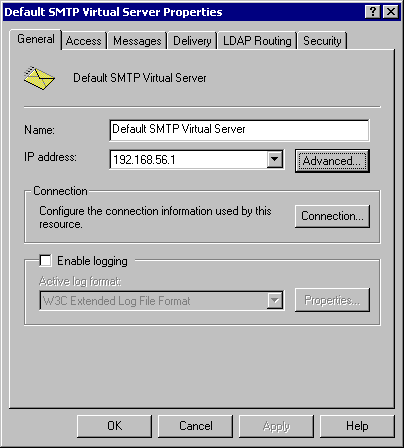
Expand the tree under the server name. Right click on the Default SMTP Virtual Server and select Properties
-
Assign an IP address to the server and click the OK button
Step 3: Configure the SMTP Service to relay email to your mail server
Creating a local domain in IIS to route email:
-
Click the Start menu, point to Programs
-
Click Administrative Tools
-
Click Internet Services Manager
-
Expand the tree under the server name
-
Expand the Default SMTP Virtual Server
-
By default, you should have a Local (Default) domain with the fully qualified domain name of the server
-
-
Configure the domain for inbound:
-
Right click the Domains icon, click New, and then click Domain
-
Click Remote, click Next, and then type the domain name in the Name box. Click Finish
-
-
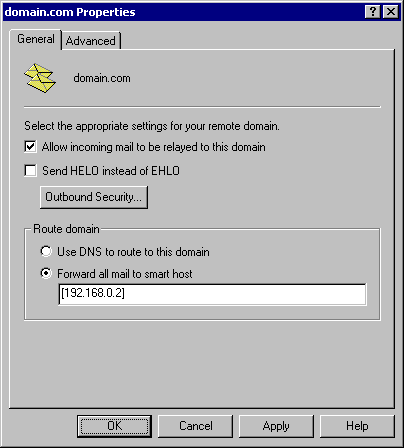
Access the Properties dialog for the domain that you just created and check the Allow the Incoming Mail to be relayed to this Domain check box
-
Click the Forward all mail to smart host option, then type the IP address of the server that is responsible for email of that domain in square brackets. For example: [123.123.123.123]
-
Note: Typing the IP address of the server in brackets is necessary so that the server recognizes that this is an IP address, and thus avoids any attempts at performing a DNS lookup
-
-
Click the OK button
Notes:
- The following step-by-step instructions use a Microsoft Windows Server 2003 operating system as a reference. Some of the locations and paths may vary for a Microsoft Windows Server 2008 machine.
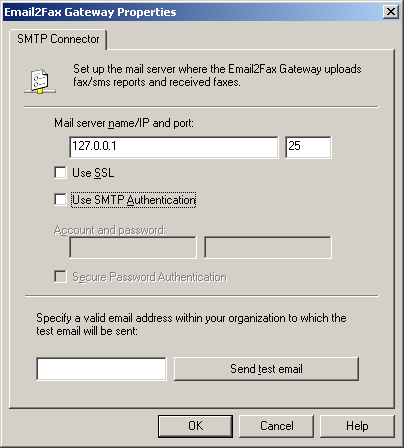
- In most cases this procedure will not be necessary, as you can configure the Email2FAXGateway to point directly to most mail servers
Priyanka Bhotika
Comments