Overview
This article provides instructions for enabling Master Authentication (Master Auth), along with additional information about the workings of its internal mechanism in Kerio Connect.
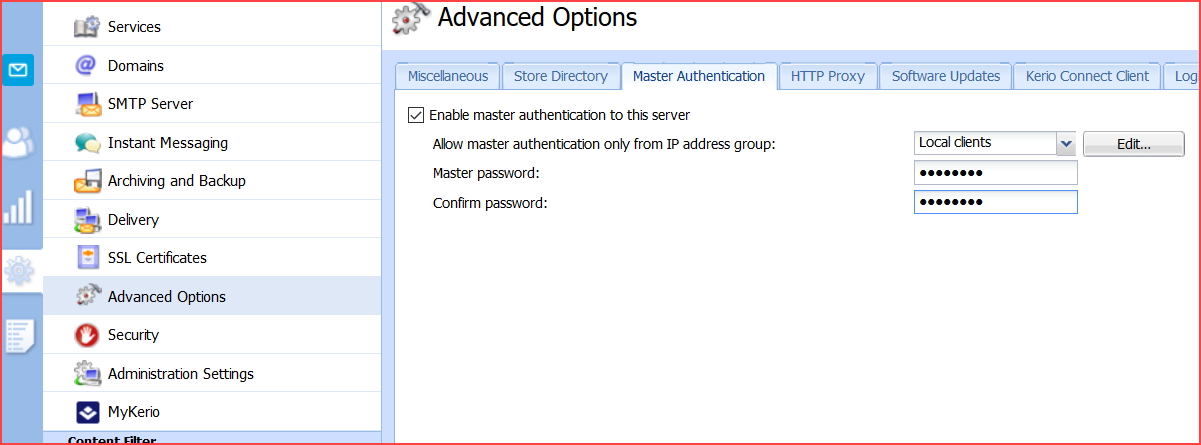
Enabling Process
To enable the Master Authentication process, follow the steps detailed in the process below.
-
Open Kerio Connect Webadmin.
-
Navigate to the Configuration > Advanced Options > Master Authentication tab.
-
Select Enable Master Authentication to this server.
-
Choose the necessary IP address group.
-
Specify the Master Password.
-
Click Apply.
Master Auth Internal Mechanism
The following steps detail how Master Auth works:
-
The client sends the X-MASTERAUTH command:
C: a X-MASTERAUTH. -
The server responds with a challenge:
S: + <random-challenge-string>. -
The client links together the challenge string with the master password and computes the resulting string's MD5.
"<random-challenge-string>masterpassword" -> MD5 -> c1e1b75f2de352d6a214f4131c07e400 -
Then the client sends this MD5 to the server as a hexadecimal ASCII string.
C: c1e1b75f2de352d6a214f4131c07e400 -
The server checks the MD5 and announces the authentication result. There are two possible results.
-
S: a OK X-MASTERAUTH Welcome to server, master, or -
S: a NO X-MASTERAUTH failed
-
-
The client switches to the selected user account with the X-SETUSER command.
C: b X-SETUSER "username" -
The server responds with a confirming X-SETUSER command.
S: b OK X-SETUSER completed
Example:
C: a X-MASTERAUTH
S: + <random-challenge-string>
C: c1e1b75f2de352d6a214f4131c07e400
S: a OK X-MASTERAUTH Welcome to server, master
C: b X-SETUSER "username"
S: b OK X-SETUSER completed
Priyanka Bhotika
Comments