Overview
When you install Kerio Connect on a local network behind a firewall (Kerio Control), you must map the ports properly to send and receive communication over the network.
Note: The same ports should be opened for any other third-party firewall solution, like Sophos, Cisco, or pfSense.
Process
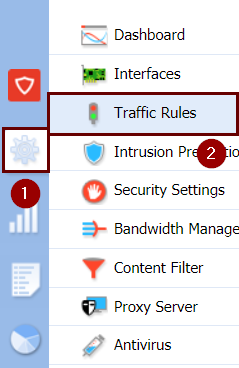
- In the Kerio Control administration interface, go to Configuration (gear icon).
- Select Traffic Rules.
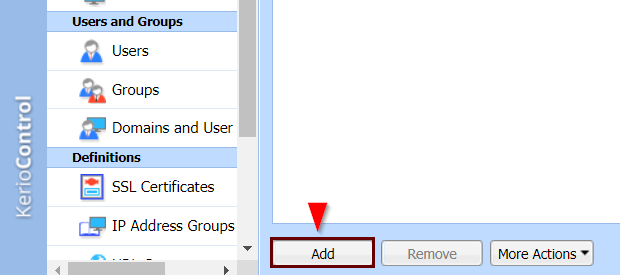
- Click Add.
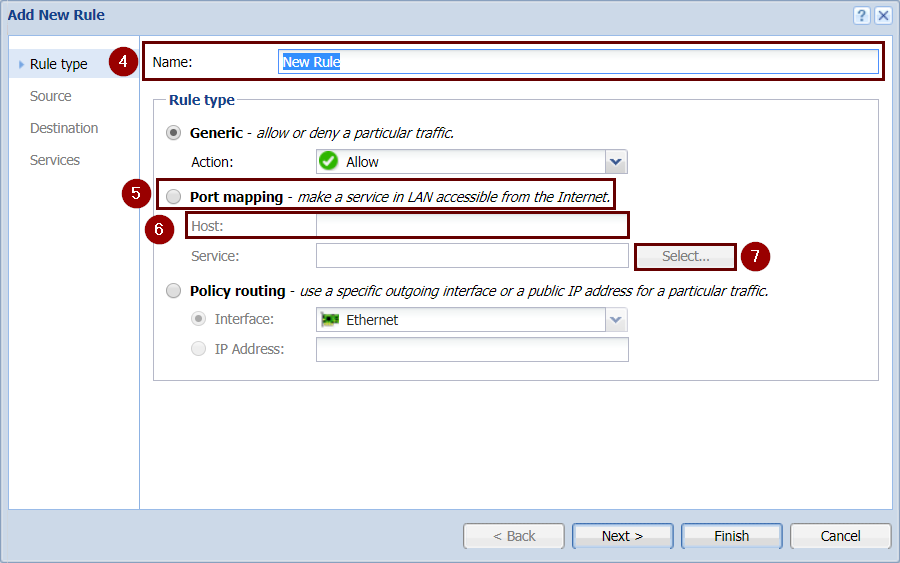
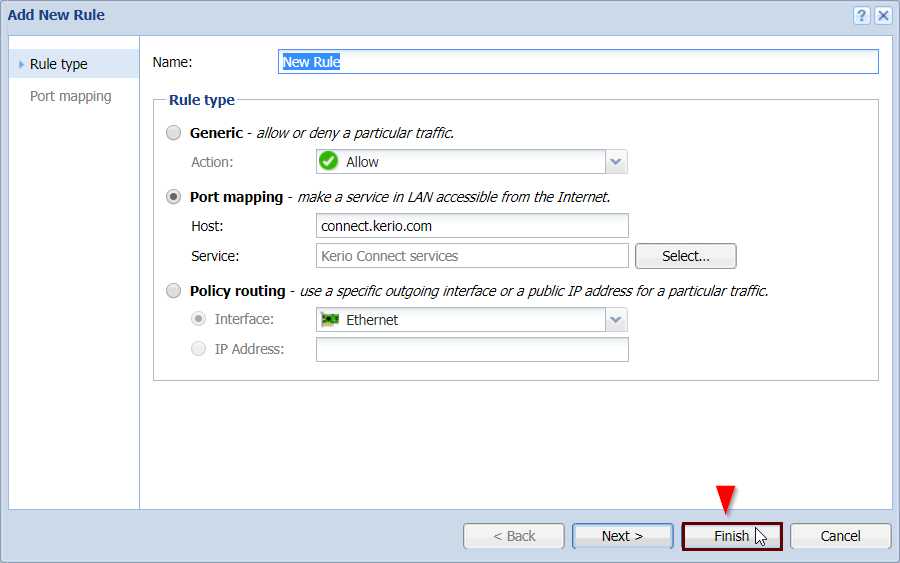
- In the Add New Rule wizard, type the name of the rule.
- Select Port mapping.
- In the Host field, type the hostname or the IP address of the SMTP server placed in your local network.
- Next to the Service field, click Select.
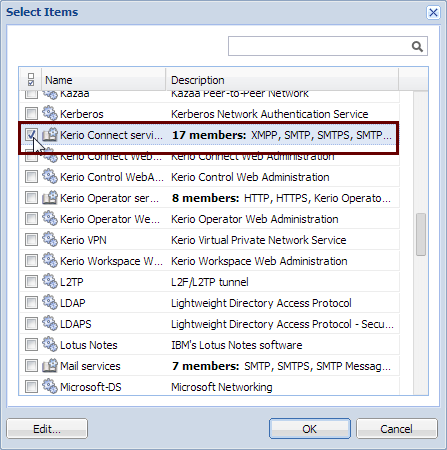
- In the Select Items dialog, check the ports and map them as follows:
Service (default port) Incoming connection SMTP (25) allow SMTPS (465) allow SMTP Submission (587) allow POP3 (110) deny POP3S (995) allow IMAP (143) deny IMAPS (993) allow NNTP (119) deny NNTPS (563) allow LDAP (389) deny LDAPS (636) allow HTTP (80, 4040, 8800) deny HTTPS (443, 4040, 8843) allow - Click Finish.
Confirmation
The Kerio Control firewall settings are set. You can send and receive communication over the local network behind the firewall.
Priyanka Bhotika
Comments