Overview
This article provides the required steps to configure Scheduled scan properties in LanGuard. Additionally, it describes the different tabs available for the Scheduled Scan Properties window; this can be helpful in cases where you want to customize a Scheduled scan further or apply additional configuration different than the default.
Process
- In the LanGuard administration interface, navigate to Configuration > Scheduled Scans.
-
Select the scheduled scan and click the Scheduled Scan Properties.
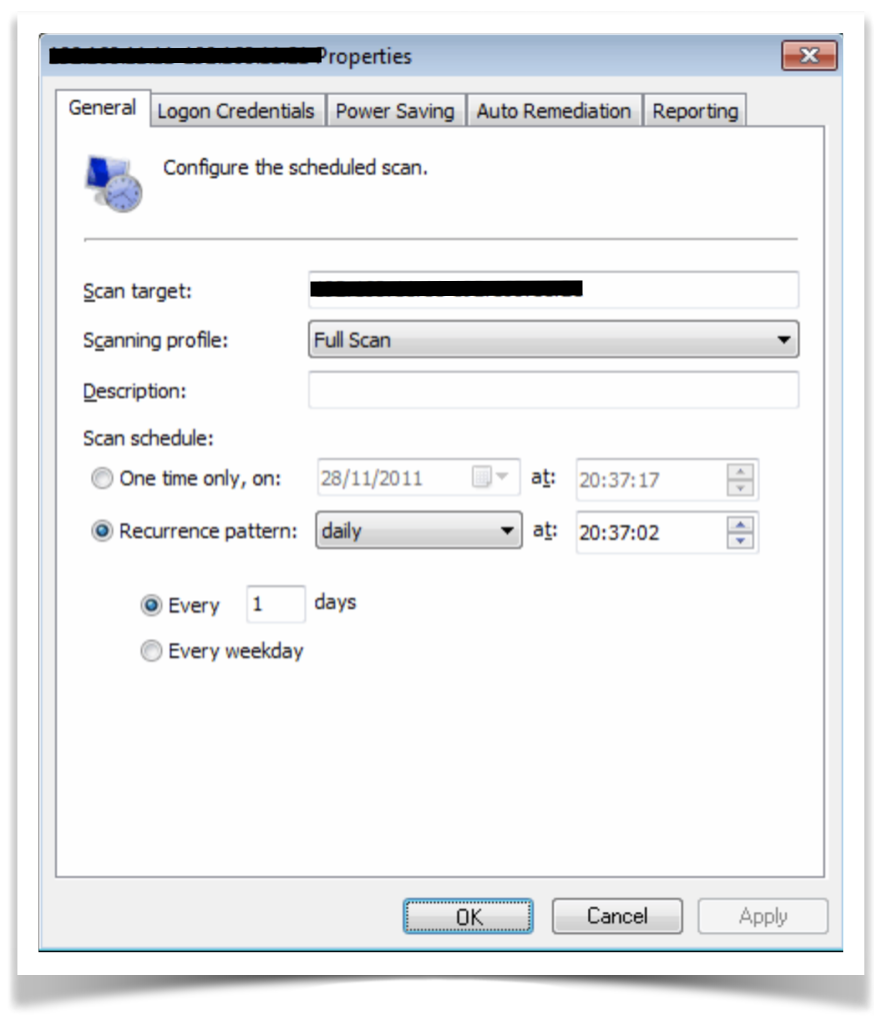
The below table describes the different tabs available in the Properties window of Scheduled scans.
Tab Description
General This tab make changes to scan target setting, type of Scanning Profile, and scan frequency.
Logon Credentials It specifies logon credentials used when scanning the specified target.
Power Saving In this tab you can configure power saving options, and it enables you to configure the scan to wait for offline machines to connect to the network, attempt to wake up offline machines, and shutdown machines when the scan is completed.
Auto Remediation In this tab you can configure the remediation options applicable to the scan being configured. This includes downloading and installing missing patches and service packs, as well as unauthorized software uninstallation.
Reporting In this tab you can configure reporting options used for the selected scheduled scan.
-
Click OK.
Confirmation
The properties configured in the Scheduled Scan Properties window are applied to the Scheduled scan.
Priyanka Bhotika
Comments