Overview
There are three steps to connect Apple OS X computer to your company network through IPsec VPN and authenticate with an SSL certificate:
Step-By-Step Guide
Step 1: Configuring Kerio Control
- Setup IPsec VPN server to use certificates issued by a Local Certification Authority. For more information refer to Configuring IPsec VPN Server.
- Go to Definitions > SSL Certificates.
-
Click Add > New Certificate and create a new certificate for VPN clients.
NOTE
Do not use IP address instead of the Kerio Control hostname.
- Click Apply in the SSL Certificates section.
- Export this certificate in the PKCS#12 format.
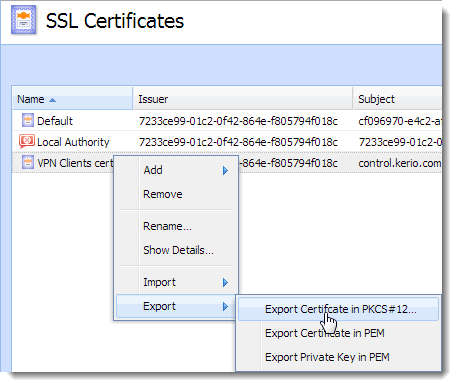
- In the Export Certificate in PKCS#12 Format dialog, use a password without national characters.
- Check Include all certificates in the certification path if possible and Kerio Control exports all higher certificates including the certification authority.
- Click OK.
Step 2: Importing the certificate
- Go to Applications > Utilities > Keychain Access.
- Switch view to System keychain and unlock the keychain.
NOTE
Do not confuse keychains. Default Login keychain is unwanted in this case.
- Drag the PKCS#12 file, drop it to the System keychain. There are at least two Kerio Control certificates — one or more certificates (blue certificate icon) and Certification Authority (gold certificate icon) in the Keychain Access.
- Locate the imported Certification Authority (CA) in the System keychain.
- Set the CA trust properties to Always trusted.
- Locate the imported certificate and ensure the certificate is trusted.
Procedure for Mac OS X 7 and newer:
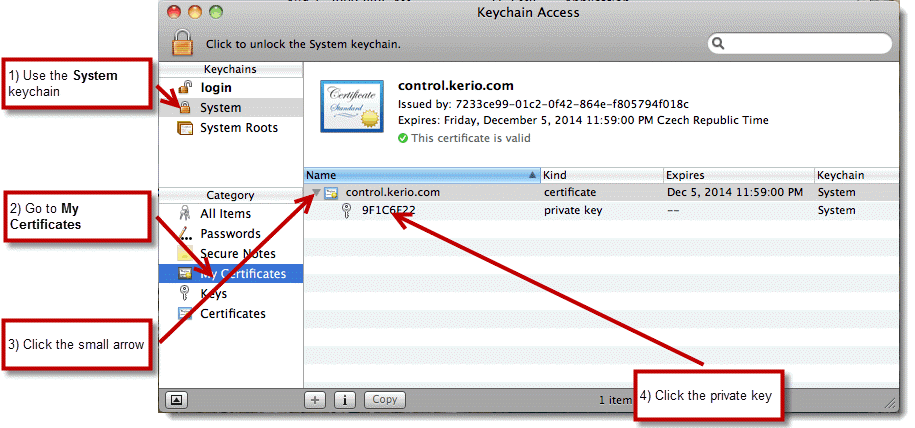
- In the System keychain, go to My Certificates.
- Find your certificate and click the small arrow and a private key appears.
- Double-click the private key and go to Access Control.
- Click the
+icon and add the following executable to the list:/usr/sbin/racoonNOTE
If you don't see the
/usrfolder when browsing for the executable, use the Show hidden files.The shortcut is
cmd-shift-.(cmd-shift-dot). - Click Open.
Keychain Access uses your SSL certificate.
Step 3: Creating VPN client on Apple OS X computer
- Go to System Preferences > Network.
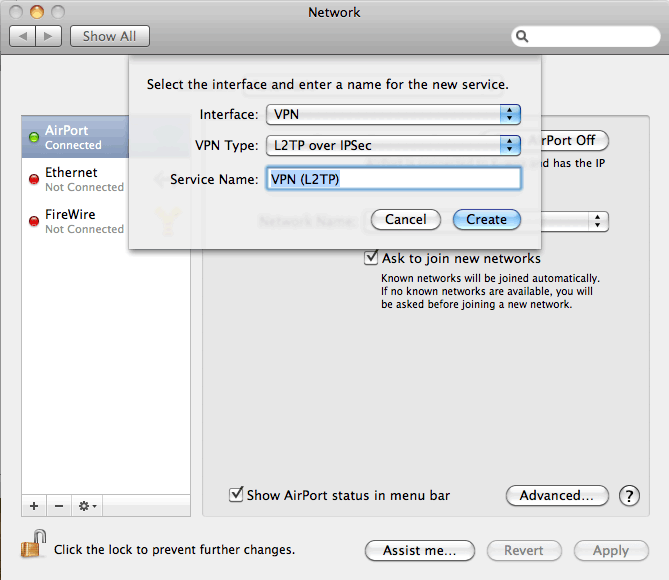
- In the Network dialog, click the + icon and add VPN.
- Select the L2TP over IPsec mode.
- Type a hostname of Kerio Control to Server Address and your Control's username to Account Name.
NOTE
Do not use IP address instead of the Kerio Control hostname.
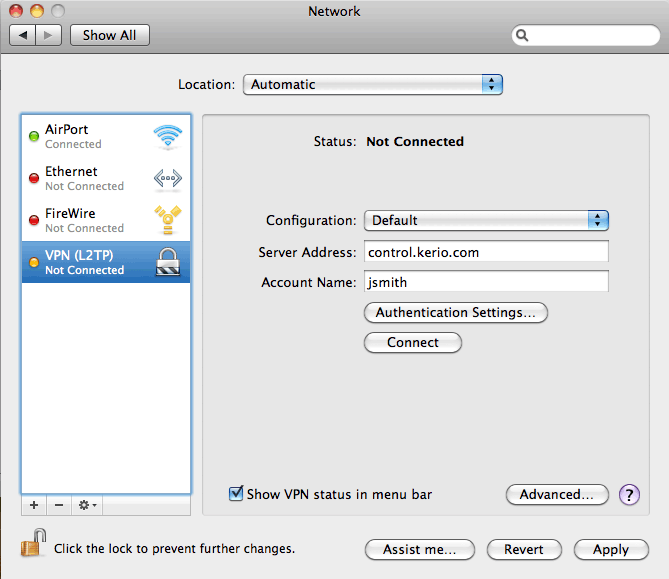
- Click Authentication Settings.
- Set user authentication by password and type your Kerio Control's password. MS-CHAPv2 might be needed.
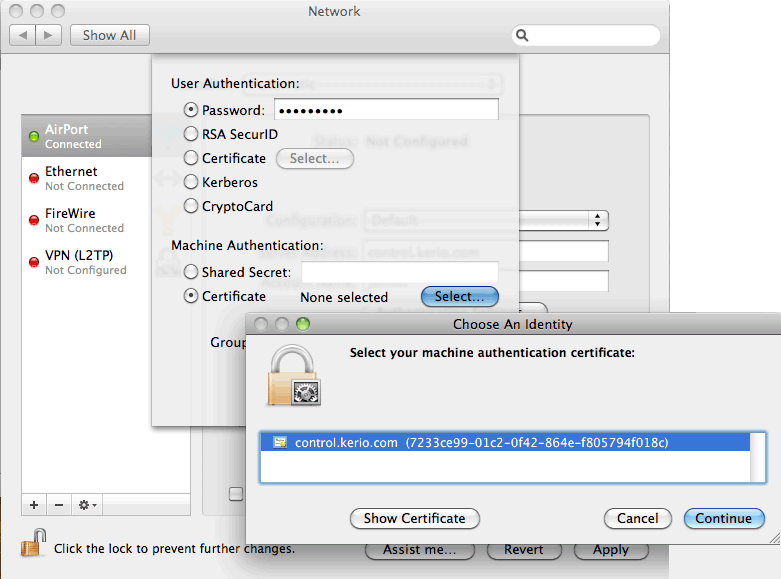
- Set Machine Authentication by a certificate, click Select and select the certificate from the previous step.
Confirmation
The Apple OS x device is now connected via IPSEC VPN.
Priyanka Bhotika
Comments