Overview
Kerio Control represents a gateway between two or more networks, typically between the local network and the Internet. The default network interface routing controls traffic passing through network adapters which are connected to these networks.
Diagnosis
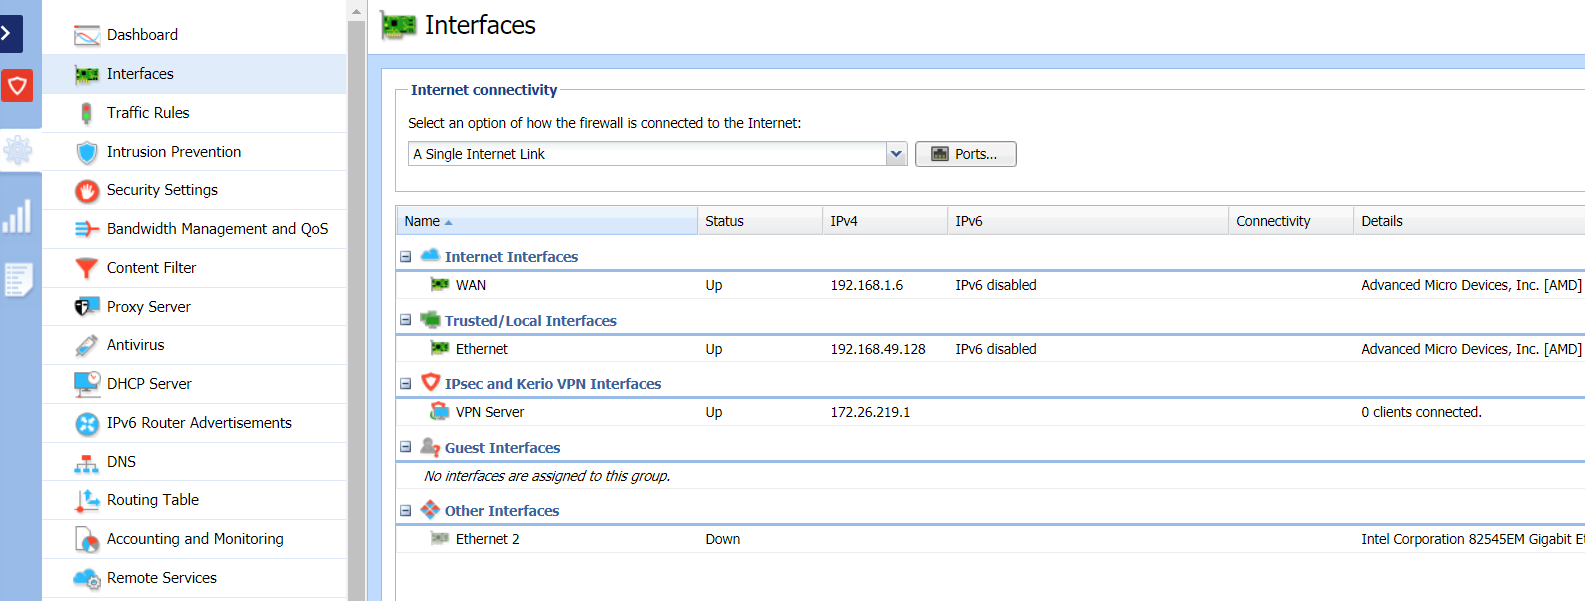
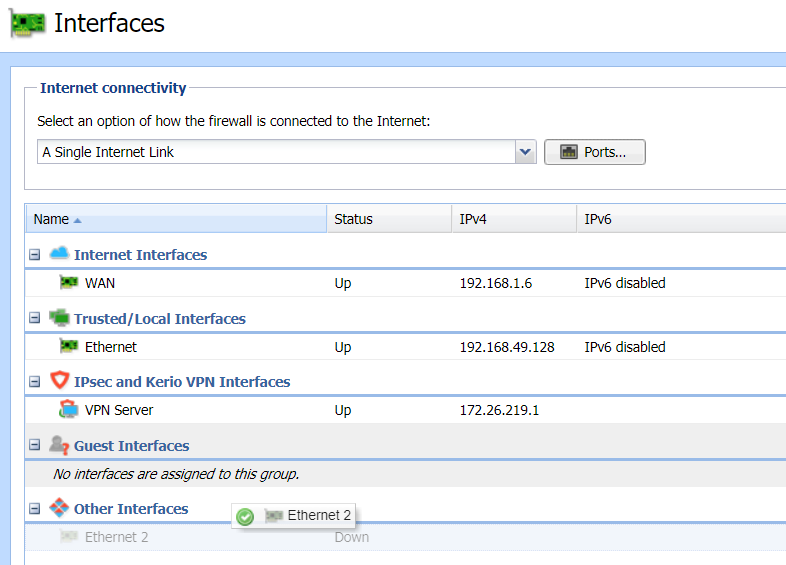
In Kerio Control, you can define the following groups of interfaces:
- Internet Interfaces — interfaces which can be used for Internet connection,
- Trusted/Local Interfaces — interfaces connected to local private networks protected by the firewall,
- IPsec and Kerio VPN interfaces — virtual network interfaces (Kerio VPN, IPsec VPN),
- Guest Interfaces — interfaces that can be used for Guest LANs.
- Other Interfaces — interfaces that do not belong to any of the groups listed above (i.e. dial-like links).
Adding new interfaces
Interfaces in Kerio Control represents:
- Network adapter — Each new network adapter in the Kerio Control computer displays as an interface in the Interfaces section. If you use a Kerio Control Software Appliance, you must put a new network adapter (NIC) to the Kerio Control computer. If you use a Kerio Control Virtual Appliance, you must create a new network adapter in your Hyper-V or VMware environment.
- Port in Kerio Control Box — In the Interfaces section displays the LAN switch interface. You can take a port from the switch and make it a standalone interface from the port.
- VLAN — If your network architecture is built on VLANs, you can add VLANs as interfaces.
Solution
Configuring interfaces
A configuration wizard is available for the setup of basic interface parameters:
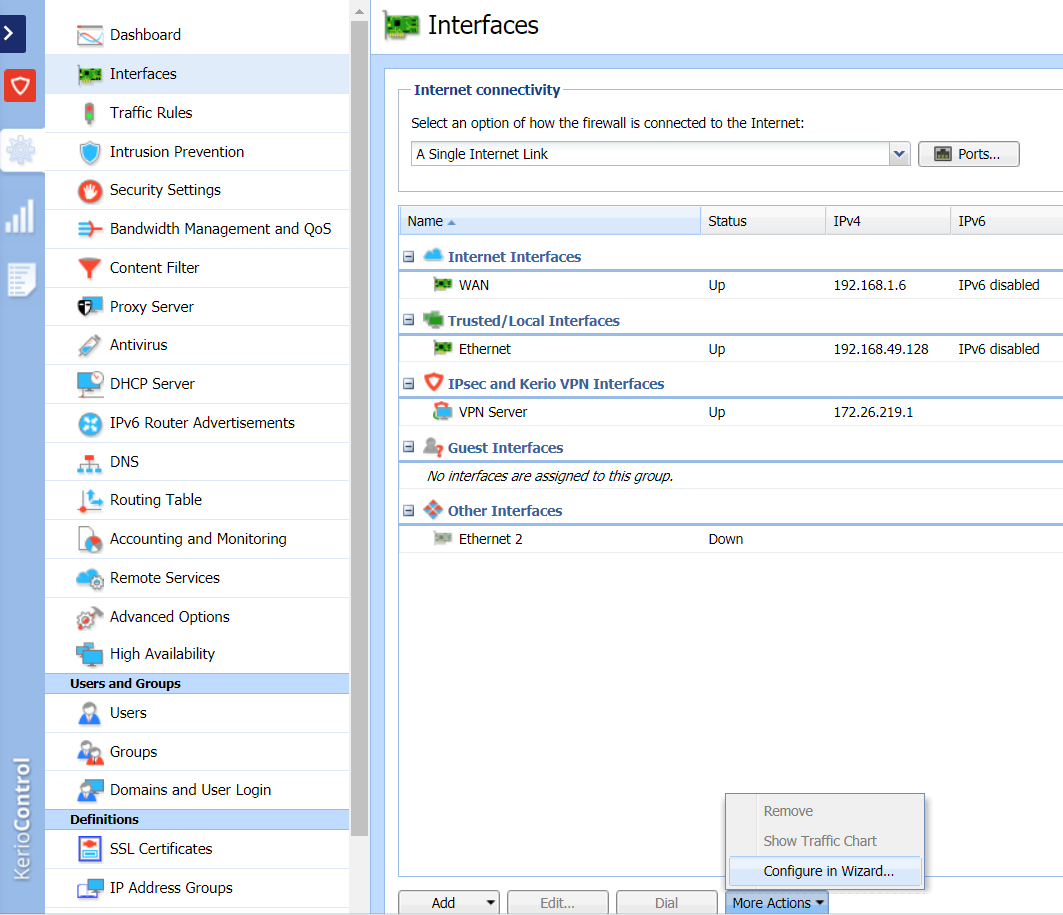
- In the administration interface, go to Interfaces.
- Click More Actions > Configure in Wizard.
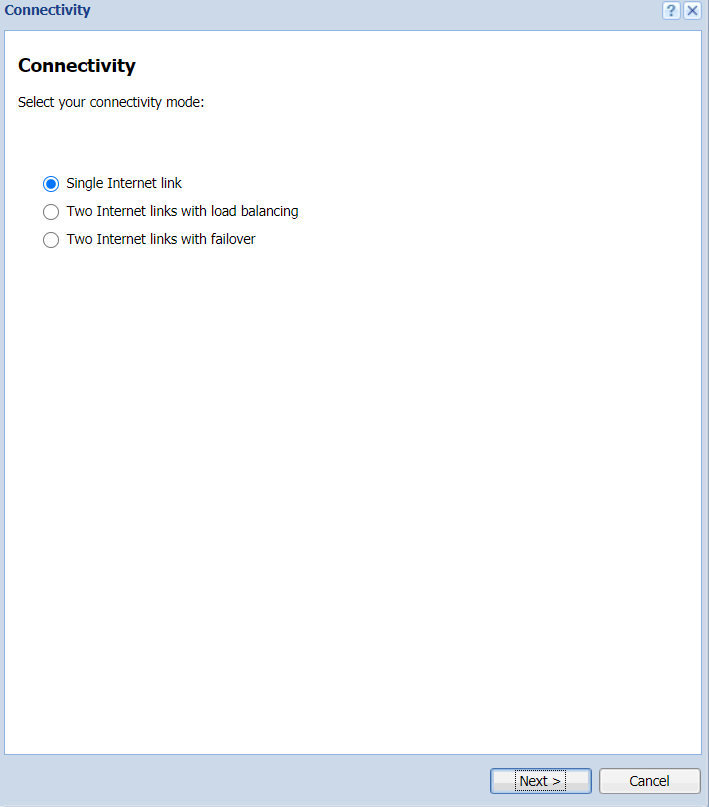
- Choose the connectivity mode: Single Internet Link, Two Internet Links with Load Balancing or Failover.
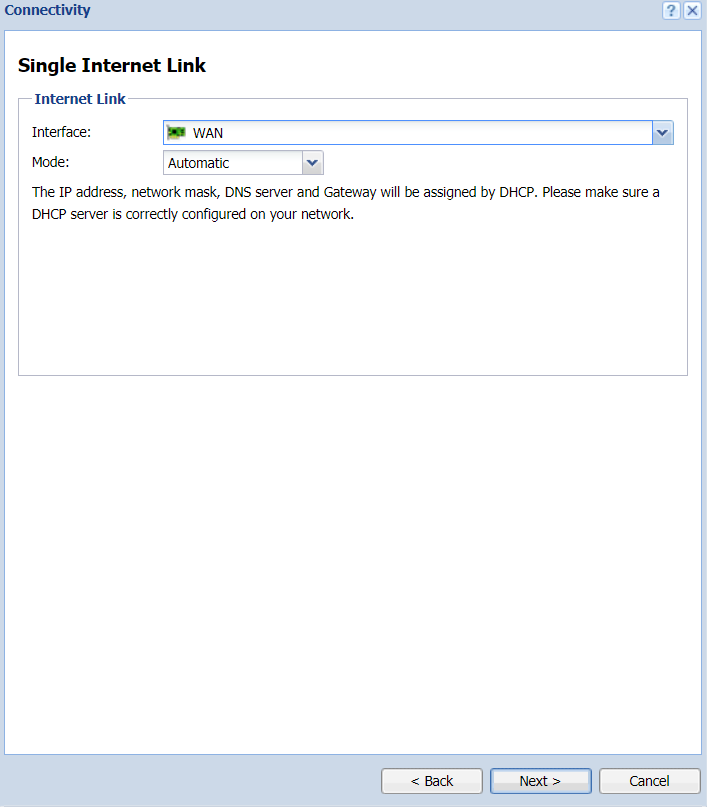
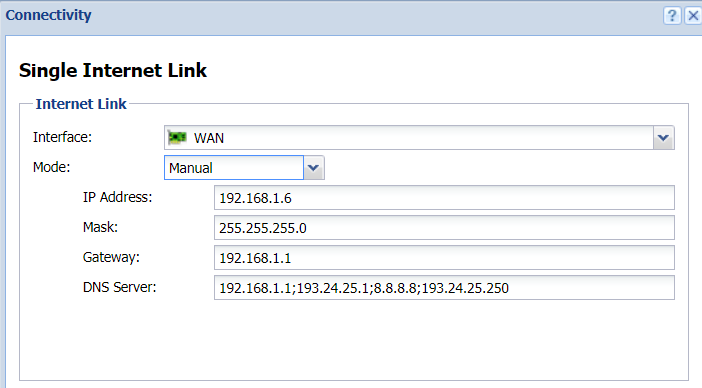
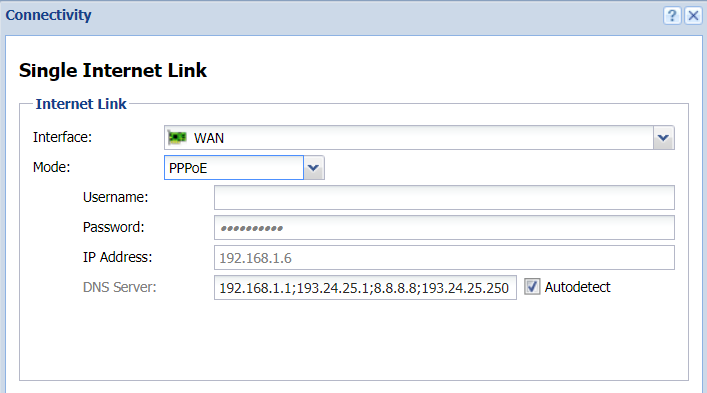
- Select the Internet Link connection mode:
- Automatic
- Manual
- PPPoE
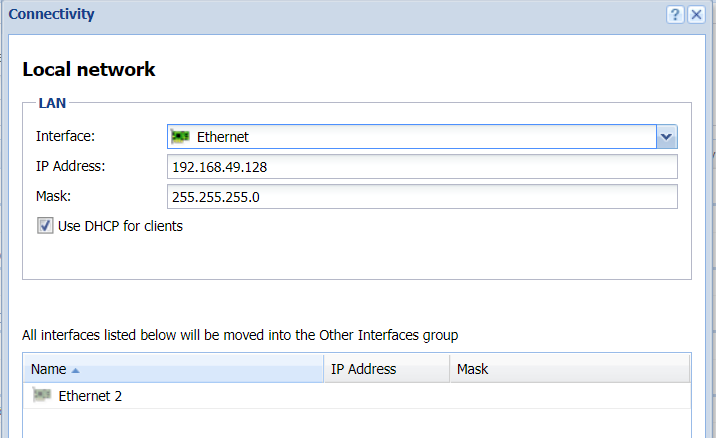
- Choose the Local network interface. (Optionally) Enable "Use DHCP for clients".
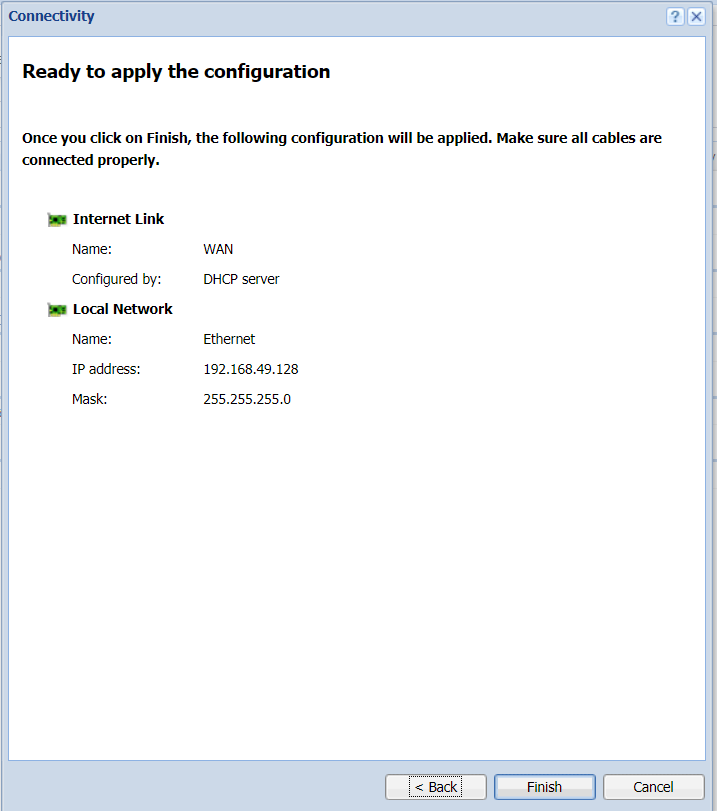
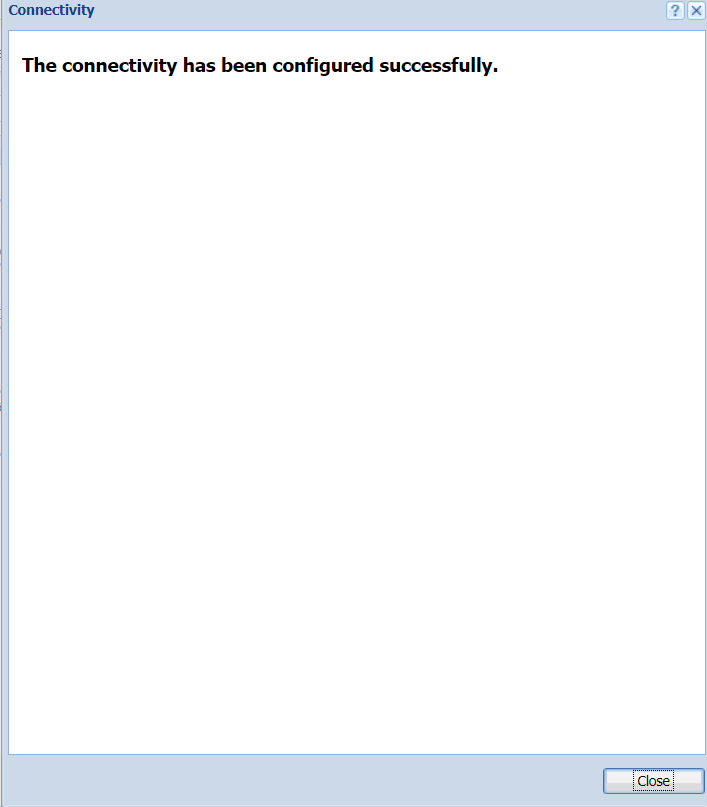
- Confirm the configuration settings.
- Click Close to finish the configuration wizard.
- Automatic
For more information, please refer to Configuration Assistant.
During the initial firewall configuration by the wizard, interfaces will be arranged into groups automatically. This classification can be changed later.
You can configure interfaces directly in the Interfaces section.
Moving an interface to another group
To move an interface to another group, drag it by mouse to the desired destination group, or select the group in the properties of the particular interface.

Configuring Internet connectivity
For networks using IPv4, it is possible to use one or more Internet connections.
- In the administration interface, go to Interfaces.
- Select one of the following options:
- A Single Internet Link — the most common connection of local networks to the Internet. In this case, only one Internet connection is available and it is used persistently. It is also possible to use dial-like links that can be connected persistently — typically PPPoE connections. Only a single-link connection is for IPv6.
- Multiple Internet Links - Failover — if the primary link fails, Kerio Control switches to the secondary link automatically. When the connection on the primary link is recovered, Kerio Control automatically switches back to it.
- Multiple Internet Links - Load Balancing — Kerio Control can use multiple links concurrently and spread data transferred between the LAN and the Internet among these links. In standard conditions and settings, this also works as connection failover — if any of the links fail, transferred data are spread among the other links.
- Click Apply.
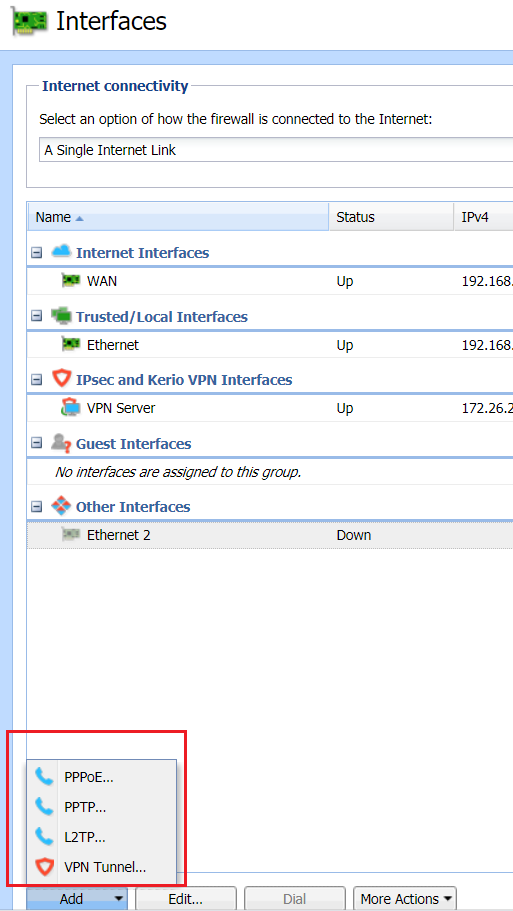
Adding tunnels
You can add an interface for a new type of tunnel by clicking on the Add button on the bottom left corner and selecting the type from the list:
- PPTP
- PPPoE
- L2TP
- VPN
Configuring Ethernet ports
Hardware appliance Edition
Kerio Control hardware appliance contains Gigabit Ethernet ports. Individual ports can be set as:
- Standalone interface
- Switch for LAN
- Not assigned — the port is inactive.
Note: It is also possible to use a virtual network (VLAN).
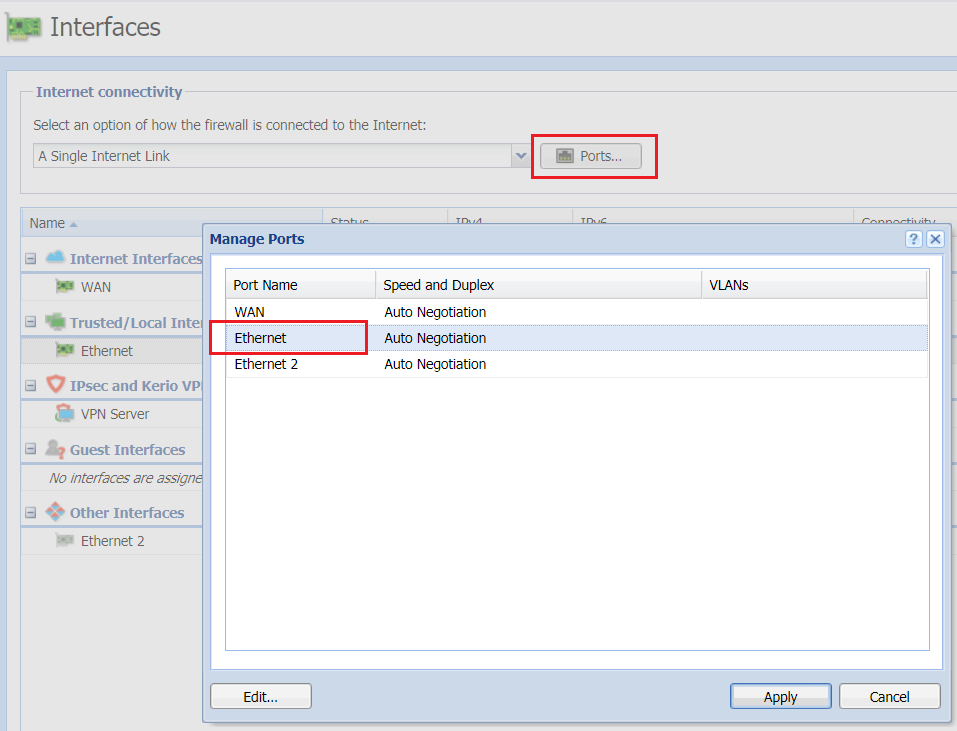
- In the administration interface, go to Interfaces.
- Click Manage Ports.
- In the Manage Ports dialog, double-click Port Name.
- In the Configure Port dialog, you can set a port as:
- Standalone interface — the port is used as a standalone Ethernet interface.
- Switch for LAN — port is a part of the switch which, in Kerio Control, behaves as one Ethernet interface.
- Not assigned — the port is inactive. This can be used for example for temporary disconnection of the computer of a network segment connected to the port.
- Speed and duplex leave as it is.
- On Ethernet interfaces, you can create one or more tagged virtual networks (VLAN).
- Save the settings.
Appliance Editions
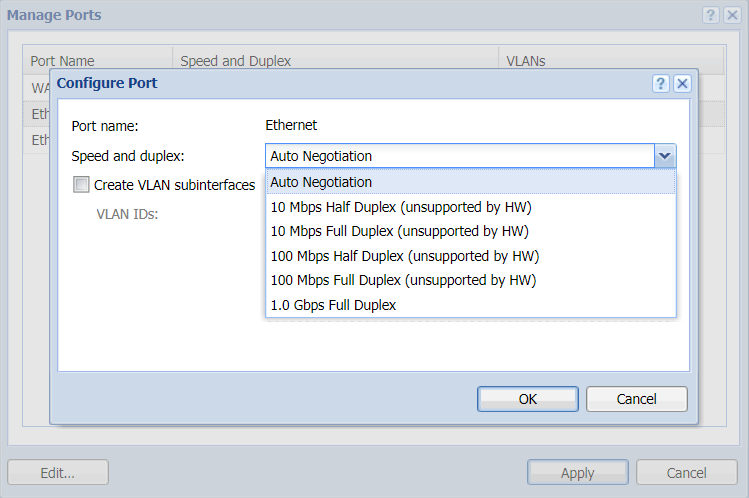
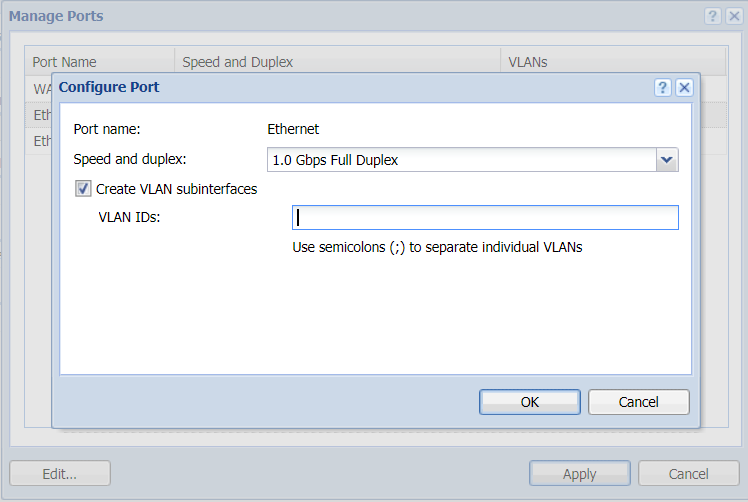
Appliance editions can set speed and duplex mode for Ethernet interfaces and create virtual networks (VLAN) on these interfaces:
- In the administration interface, go to Interfaces.
- Click Ports.
- In the Manage Ports dialog, double-click Port Name.
- Set Speed and duplex. In most cases, interconnected devices agree on speed and communication mode automatically.
- On Ethernet interfaces, you can create one or more tagged virtual networks (VLAN).
- Save the settings.
Physical interfaces (ports) cannot be added to the LAN switch. This functionality is available only in the hardware appliance edition.
Priyanka Bhotika
Comments