Overview
Once you purchase Kerio Control or extend your software maintenance, you are eligible to receive new versions of Kerio Control and its components as soon as they are available. In this article, we will walk you through configuring the Kerio Control server to check for new versions and to perform the upgrade automatically.
Process
- Checking for New Versions Manually
- Configuring Automatic Checks for New Versions
- Configuring Automatic Upgrades
- Manually Uploading a Binary File
- Upgrade for High Availability
Checking for New Versions Manually
-
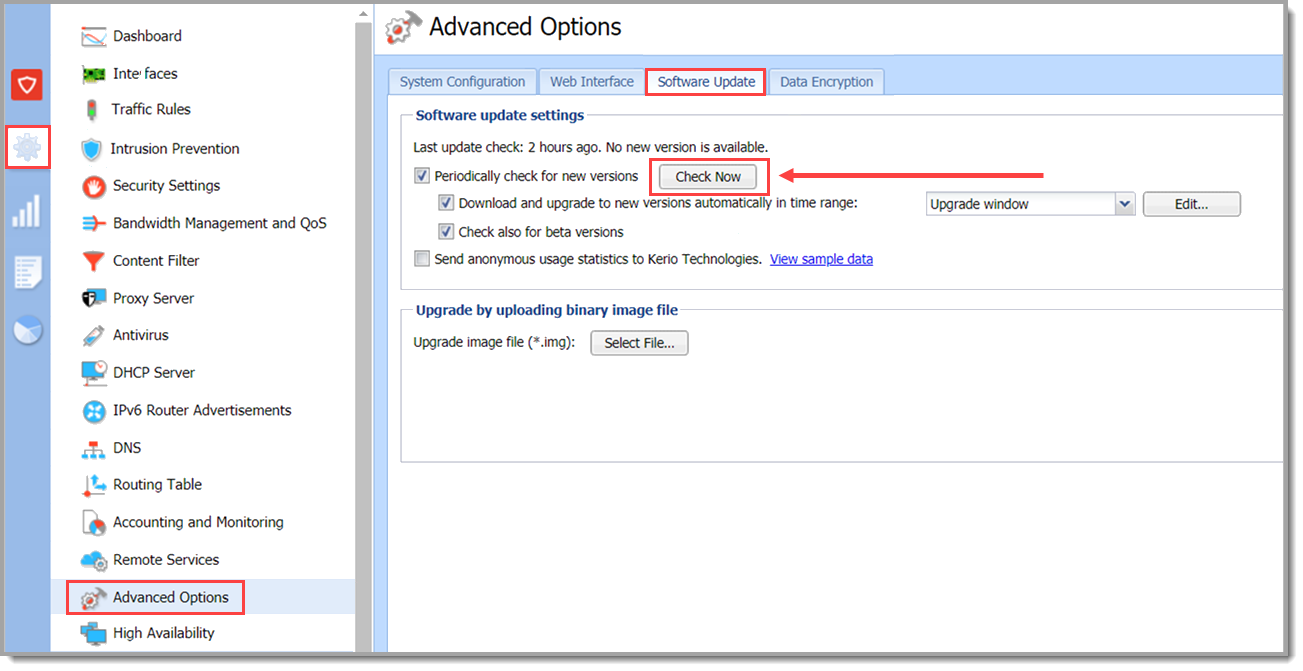
In the administration interface, go to Configuration > Advanced Options > Software Update tab.
-
Click Check Now.
Configuring Automatic Checks for New Versions
Kerio Control can automatically check for new releases. This option does not automatically download and upgrade to the latest version until you decide when you want to install the update. Here are the steps to set automatic checks:
-
In the administration interface, go to Configuration > Advanced Options > Software Updates.
-
Select Periodically check for new versions option.
-
Click Apply. From now on, Kerio Control checks new versions.
Note: Kerio Control checks for updates every 24 hours. Once a new version is available, the Software Update tab displays a link to the download page. (You can also select the Check also for beta versions option. If Kerio Control is used in production, we do not recommend enabling this option.)
Configuring Automatic Upgrades
If you always want your Kerio Control to upgrade to the latest version, you can set automatic upgrades by following these steps:
-
In the administration interface, go to Configuration > Advanced Options > Software Update tab.
-
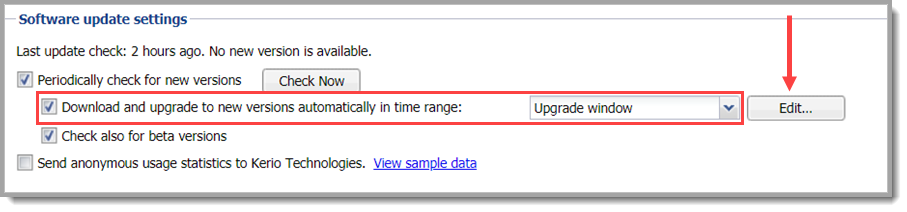
Select the Download and upgrade to new versions automatically in time range: option.
-
Click Edit and specify the upgrade window.
Note: The Kerio Control upgrade workflow starts with checking for updates. If a new version is available, Kerio Control automatically downloads it. Then, Kerio Control waits for the specified upgrade window/time range. The time range is set to every Friday night by default.
-
Click Apply.
Manually Uploading a Binary File
You can manually upload a binary image file of Kerio Control to do any of the following:
- Downgrade Kerio Control
- Upgrade to a custom version (e.g., the beta versions that are available through GFI insider)
- Upgrade with USB tools
Here are the steps to upload a binary file:
-
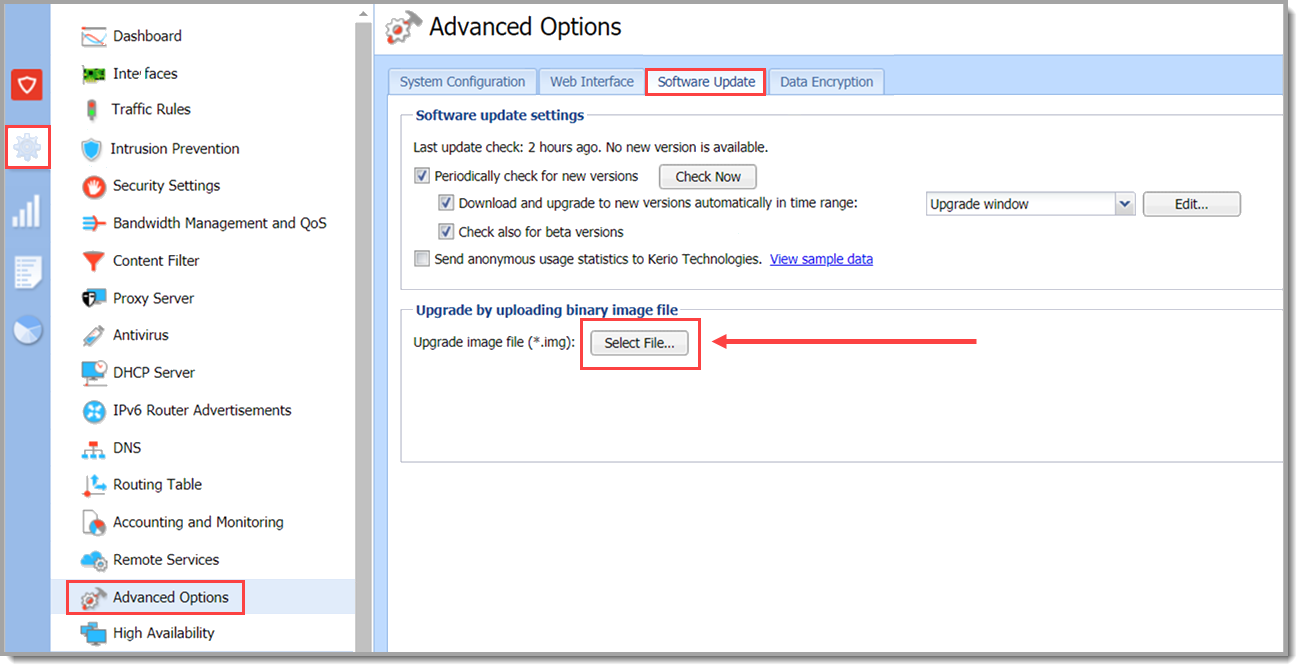
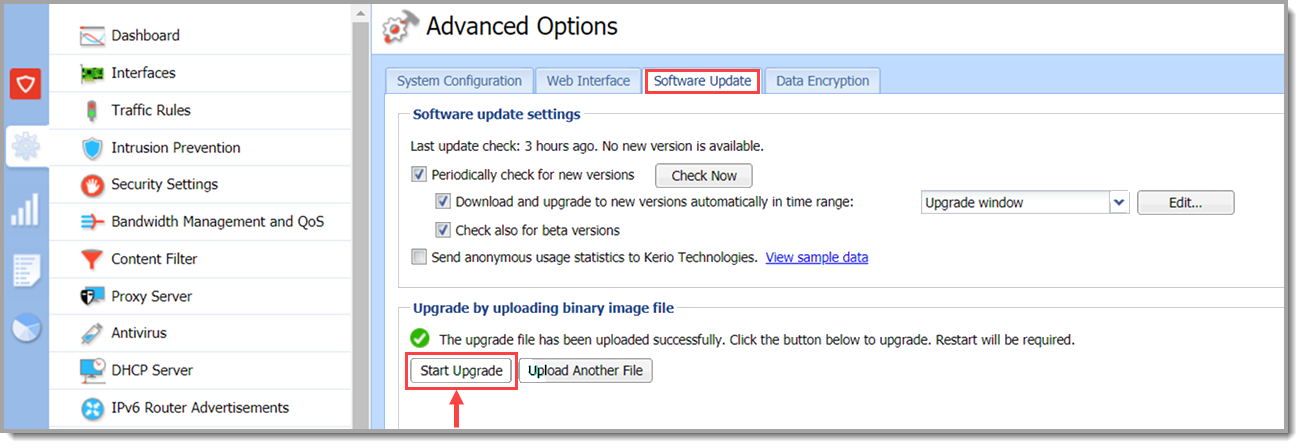
In the administration interface, go to Configuration > Advanced Options > Software Update tab.
-
Click Select File.
-
Select the upgrade image file
kerio-control-upgrade.img: -
Wait for the file upload to finish.
-
Click Start Upgrade and wait for the upgrade and restart of Kerio Control.
Upgrade for High Availability
If you have configured High Availability, please follow the following upgrade process:
-
Upgrade Master appliance.
-
Upgrade Slave appliance.
-
Allow some time for the HA synchronization.
Additional Information
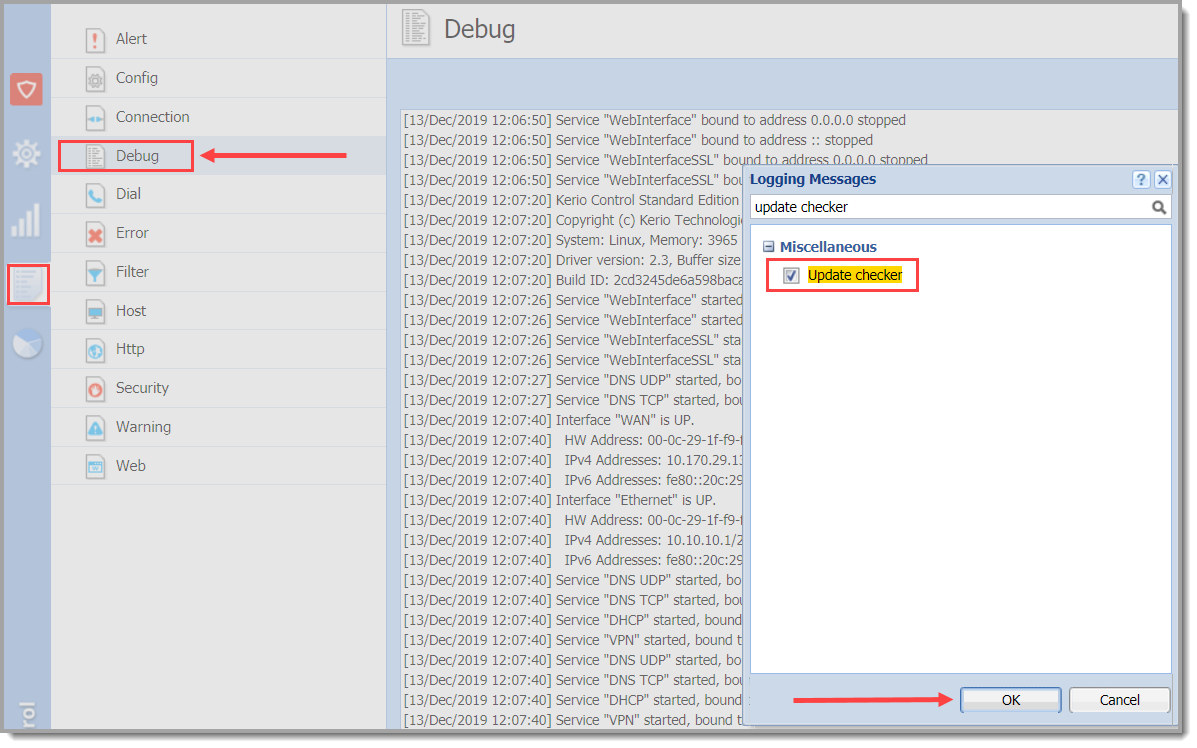
If any problems regarding updates occur, check the Debug log — right-click the Debug log area and check Logging Messages > Update Checker. Click OK.
Priyanka Bhotika
Comments