Overview
The Kerio Active Directory Extension (KADE) is installed to integrate Kerio client services with Microsoft's Active Directory. This article provides the steps in installing the Kerio Active Directory Extension into the Microsoft Active Directory. After installing the extension, items containing specific Kerio Connect information are added to the Active Directory.
Process
-
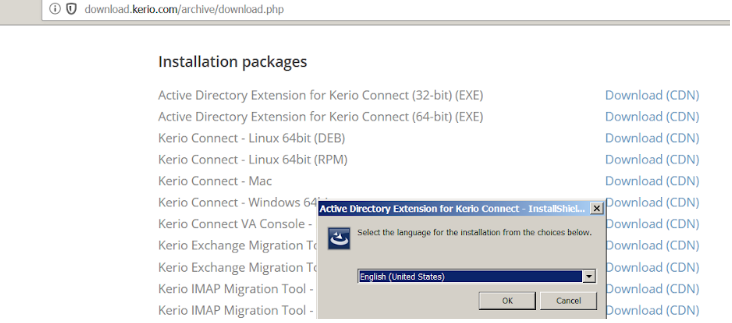
Download the Kerio Active Directory Extension, refer to Downloading Kerio Connect Directory Extensions and Migration Tools.
-
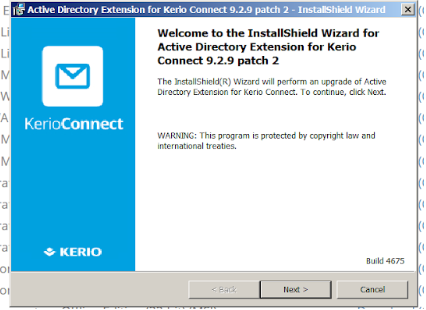
Double-click the .exe file and run the KADE installer.
-
Choose the language and click OK.
- Click Next in the first configuration window.
-
Click Install to begin the installation.
-
Click Finish to complete the installation.

Confirmation
To confirm that the installation was performed correctly:
-
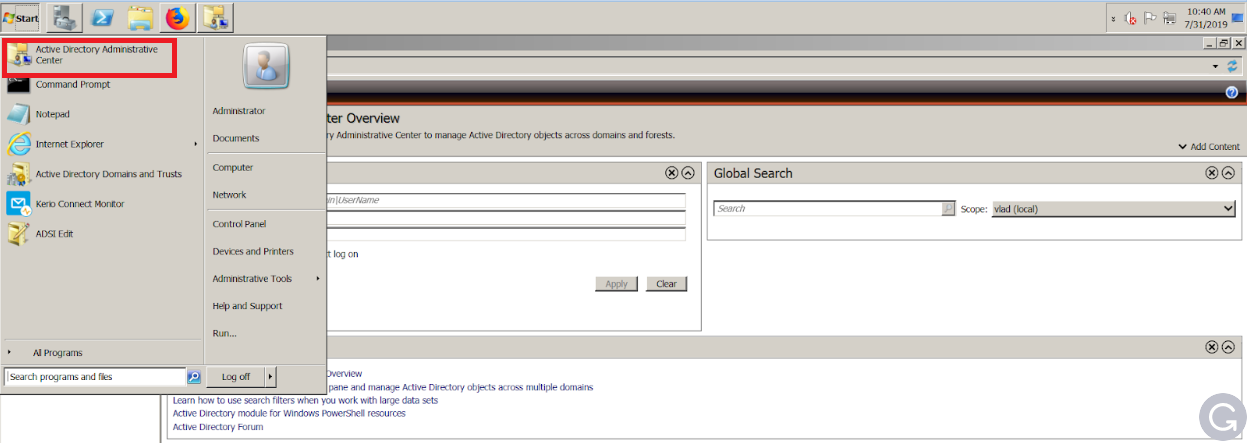
Open the Active Directory Administrative Center.
-
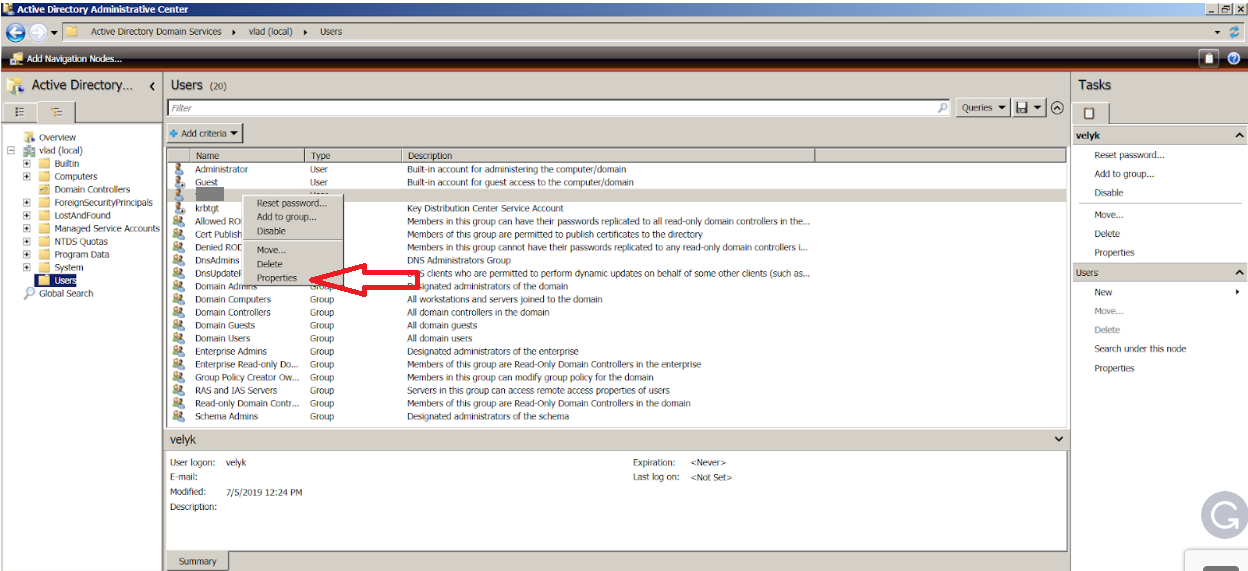
Click on Domain > Users and right-click on any user, then go to Properties.
-
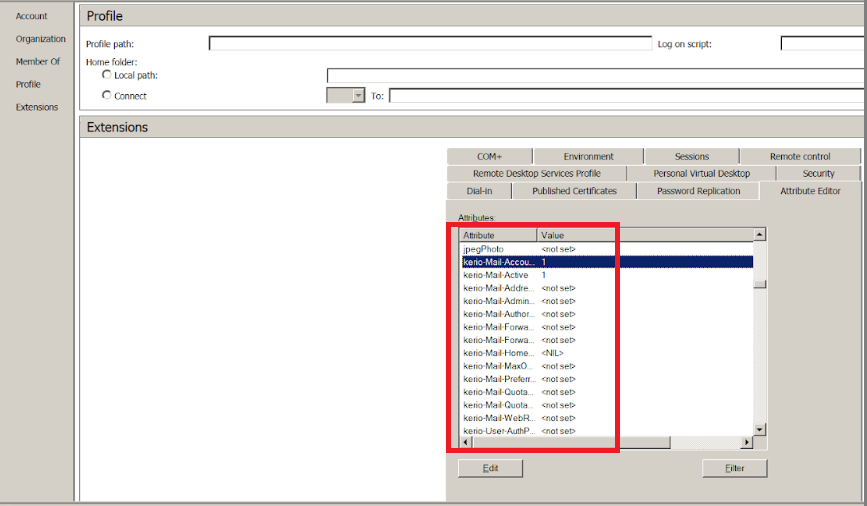
Open the Profile > Attribute Editor and scroll down to see if the Kerio attributes were added.
Additional Resources
Installing the KADE is performed as part of the Directory Service integration. Make sure you follow-through the below articles to learn about the other steps of the entire integration process:
If you are looking to integrate Directory Services with Open Directory for Apple users, refer to the article Installing Kerio Open Directory Extension (KODE).
Priyanka Bhotika
Comments