Overview
You can add user and/or company details to the domain footer in Kerio Connect. This footer is added automatically at the end of the messages in Kerio Connect.
This article describes the process of customizing domain footers by adding user and/or company details.
Process
Note: The contact details used in this article are purely fictitious and used for training purposes.
- Fill in the information in the Users' Account Details.
- Create Company Locations.
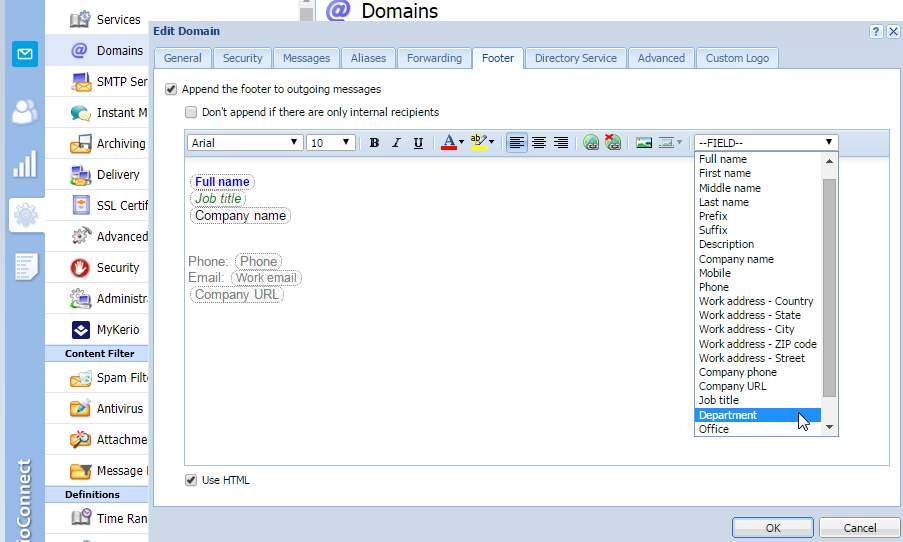
- In the administration interface, navigate to the Configurations > Domains section.
- Select a domain and click Edit.
- Select the Footer tab.
- Define the footer using items in the Field drop-down list.
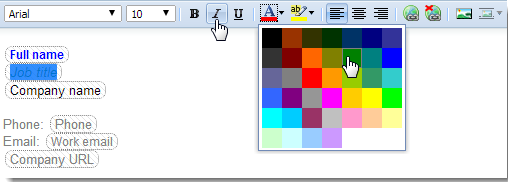
- If you select the Use HTML option, you can format the fields. Select the field and apply formatting attributes.
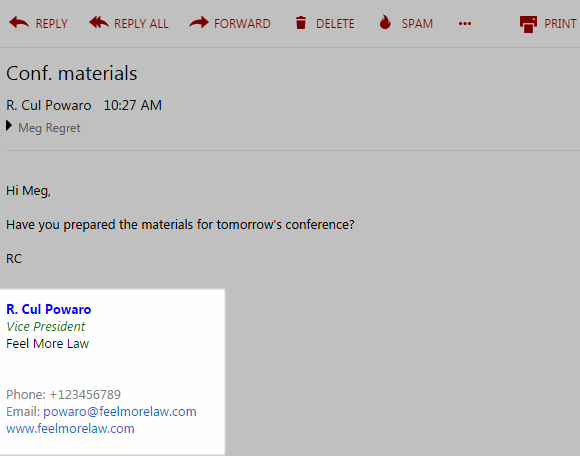
- Click OK. The final footer might look like this:
Note: If the user sends digitally signed or encrypted messages, Kerio Connect does not append any footers to the message.
Priyanka Bhotika
Comments