Overview
MyKerio is a cloud service that enables you to administer numerous Kerio Control appliances from a single dashboard. This article describes a process for adding Kerio Control to MyKerio.
Process
There are two ways how to add Kerio Control to MyKerio:
- Using MyKerio settings.
- During the Kerio Control Installation.
Using MyKerio Settings
Follow these steps:
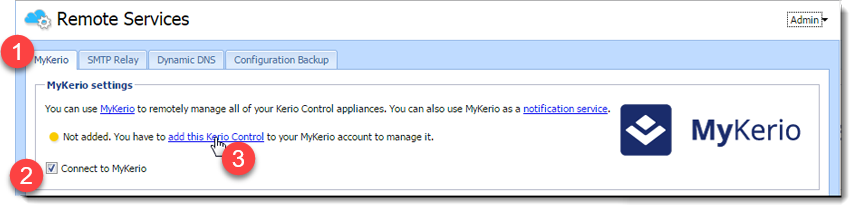
- In the Kerio Control administration interface, go to Remote Services > MyKerio > MyKerio Settings.
- Checkmark and enable the option Connect to MyKerio.
- Click the link 'add this Kerio Control'. Your web browser opens MyKerio Site, where you can register or log in if you are already registered.
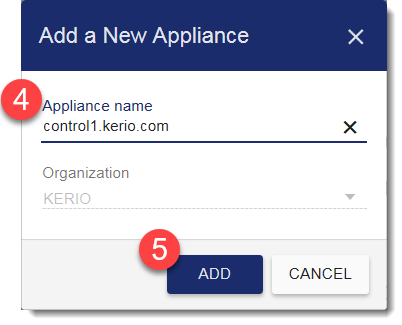
- After a successful login, MyKerio displays the Add a New Appliance dialog box. Type the name of the Kerio Control appliance (for example, your company name). Select more organizations if you have them created in MyKerio.
- Click Add.
Confirmation
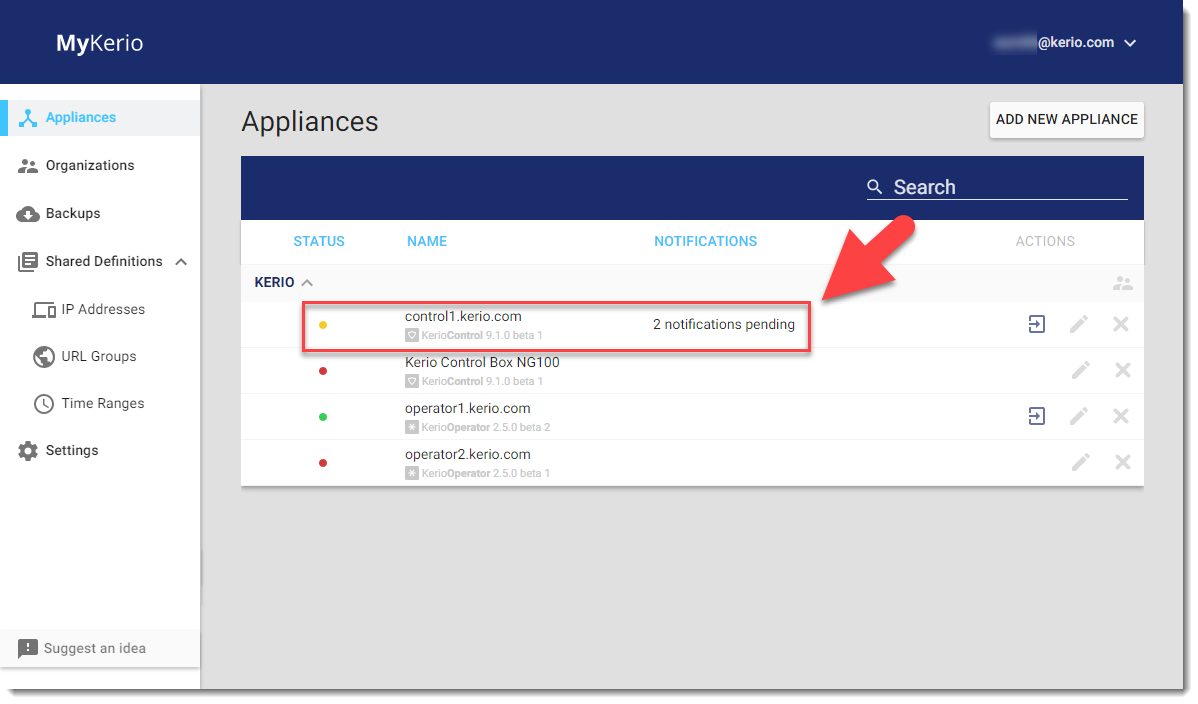
You are now connected to MyKerio, and you can see the Kerio Control appliance in the MyKerio dashboard.
During the Kerio Control Installation
Follow these steps:
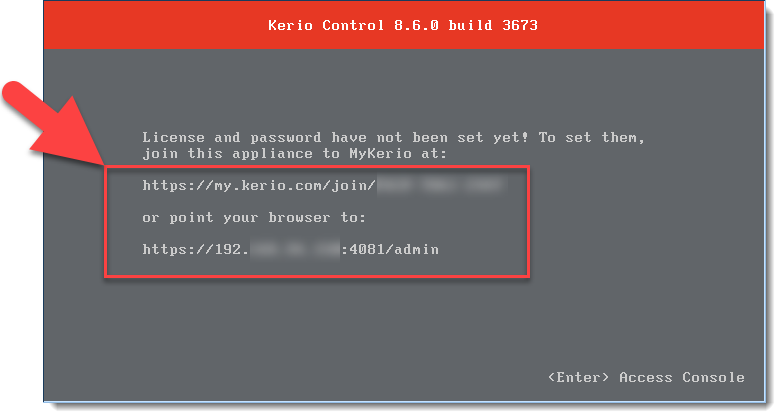
- When installing the new Kerio Control appliance, the last installation dialog shares a link to MyKerio, as seen below. Copy this link.
Note: If you miss the link during the installation, you can add Kerio Control to MyKerio later Using the Kerio Control Administration console, as described above.
- Enter the link in your browser, which opens the MyKerio Login page.
- Register or login if you are already registered. This opens the MyKerio with the Add a New Appliance dialog box.
- Type the name of the newly installed appliance.
- Click Add.
Confirmation
The MyKerio dashboard shows the appliance status as green.
Priyanka Bhotika
Comments