Overview
Delegation is an advanced type of sharing. You can delegate only to individual users, not a group of users. However, you can delegate to as many users as you like. Delegates can have access to your inbox and main calendar.
The delegate can act on your behalf to confirm your event invitations; send and receive messages on your behalf.
Note: A delegate cannot create private events on another person's behalf, nor can they view or edit the person's other private events.
Step By Step Guide
Delegating Users
You can delegate as many users as necessary.
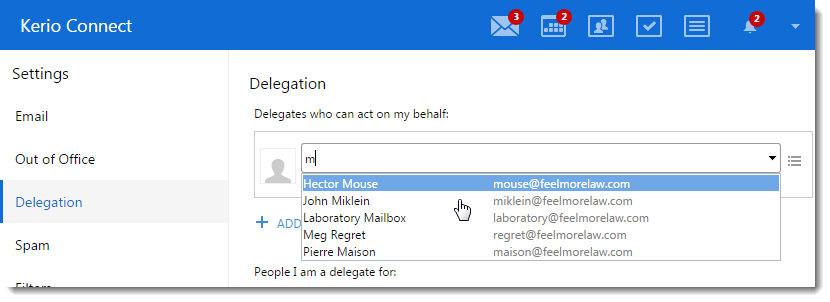
- Click Tools > Settings (Windows Client), or Kerio Connect > Settings (Mac Client), or your name > Settings (Web Client).
- Go to the Delegation section.
- Click Add delegate and type the name or email address of a user. Kerio ConnectClient offers users as you type. When you see the name of the person you want to make a delegate, select it.
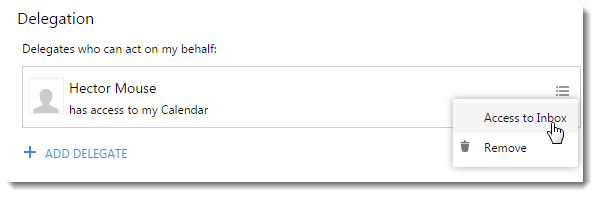
- By default, your delegates have access only to your calendar (they can send and accept event invitations). To allow access to your Inbox, click the menu icon and select Access to Inbox.
- Click Save.
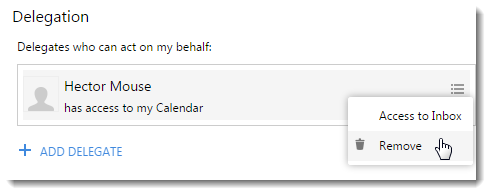
Removing Delegation
If you want to remove delegation rights from a user, click the menu icon and select Remove.
Accepting Delegation
- When someone delegates you to act on their behalf, you automatically become a delegate.
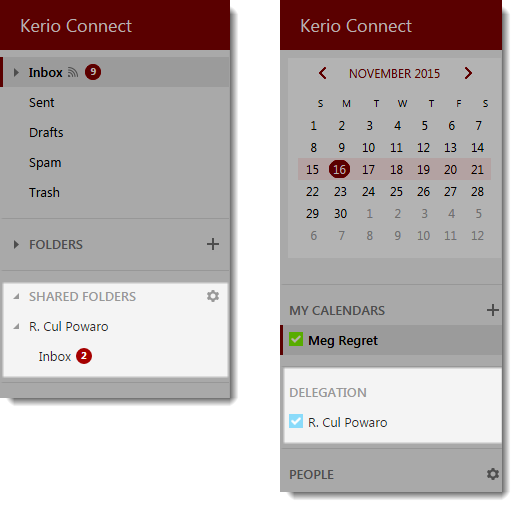
- Kerio Connect Client displays that person's inbox and calendar.
- You cannot reject delegation. However, you can hide the delegated folders.
Hiding a Delegated Inbox
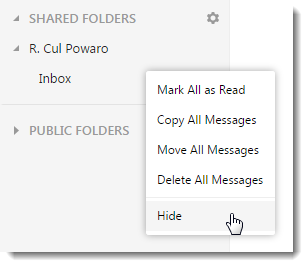
To remove a delegated inbox from your shared folders list, right-click the folder and select Hide.
You are still a delegate — you can send messages on the person's behalf — but you cannot see their inbox.
Hiding All Delegated Folders
- Click Tools > Settings (in Windows Client), or Kerio Connect > Settings (in Mac Client), or your name > Settings (in Web Client).
- Go to the Delegation section.
- In People I am a delegate for, clear the dialog box next to the person's name.
- Click Save.
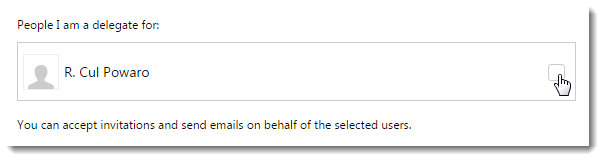
Now, you cannot send messages or create or accept events on another person's behalf. Select the dialog box again to restore your delegation rights.
Examples of Using Delegation
The following examples describe how to use delegation in Kerio Connect Client.
Example 1: Delegating Users
R. Cul Powaro has delegated Meg Regret to act on his behalf.
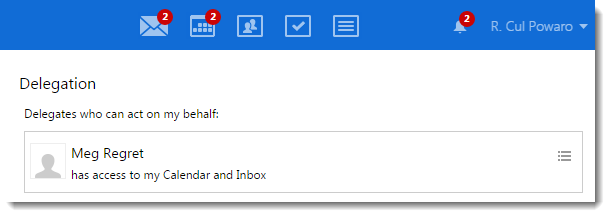
Meg automatically becomes a delegate and her Kerio Connect Client displays Mr. Powaro's inbox and calendar.
Example 2: Sending and Receiving Emails
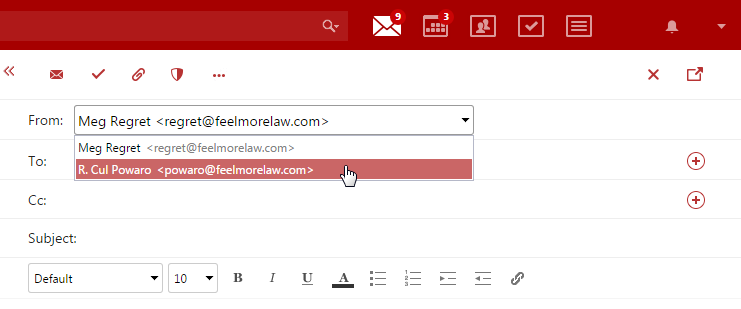
When Meg Regret wants to send a message on behalf of Mr. Powaro, she selects his address from the drop-down menu before composing a message.
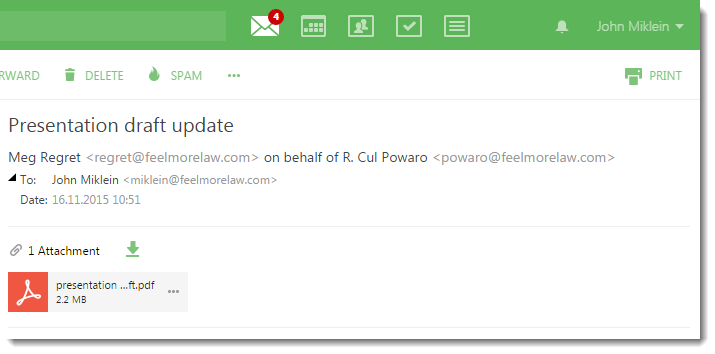
When the message arrives, the recipient can see that Mr. Powaro has delegated Meg Regret to act on his behalf.
Example 3: Creating and Accepting Calendar Events
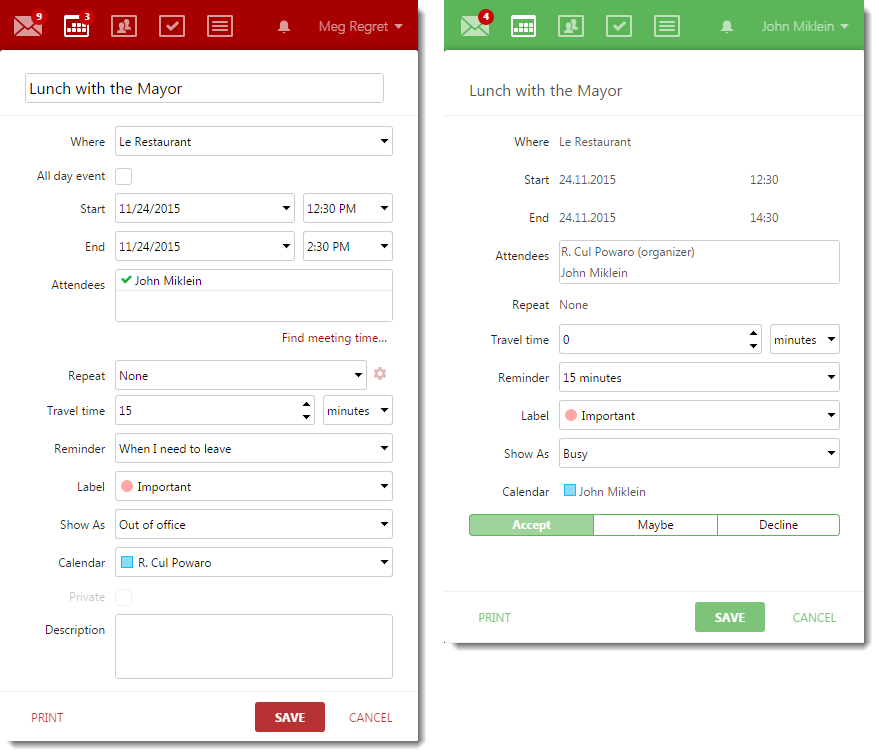
When Meg Regret wants to create an event on behalf of Mr. Powaro, she selects his calendar from the drop-down menu when creating an event.
When the invitation arrives, recipients can see it was sent by Mr. Powaro.
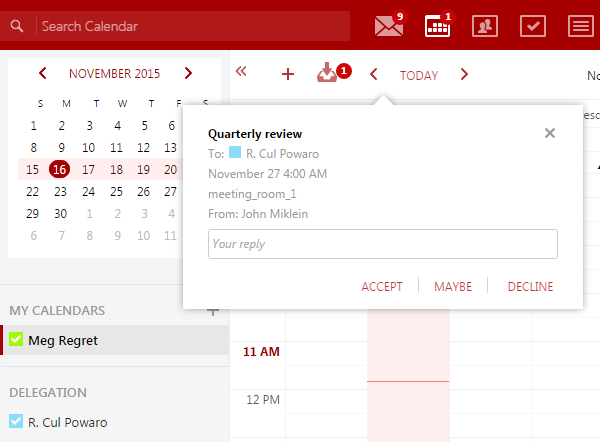
Mr. Miklein invites Mr. Powaro to a meeting. Meg Regret sees the invitation sent to Mr. Powaro and can accept it on his behalf.
Confirmation
By following the outlined procedure you have created and managed a delegation to one or more delegates as needed.
Priyanka Bhotika
Comments