Overview
In Kerio Connect Client and Webmail, you can configure various settings such as Email signature, specific Reply-To and From email address, the number of messages to be displayed, emails to be marked as read after the time interval, language interface and timezone, user password and store quota, etc.
The special Reply-To and default (primary) From address can be useful when multiple email accounts are configured or in case of user aliases and forwarding setup.
Configuring the Email Signature
In Kerio Connect Client, you can create a signature block that is automatically appended to every message you write.
- Click Tools > Settings (in Windows Client), or Kerio Connect > Settings (in Mac Client), or your name > Settings (in Web Client).
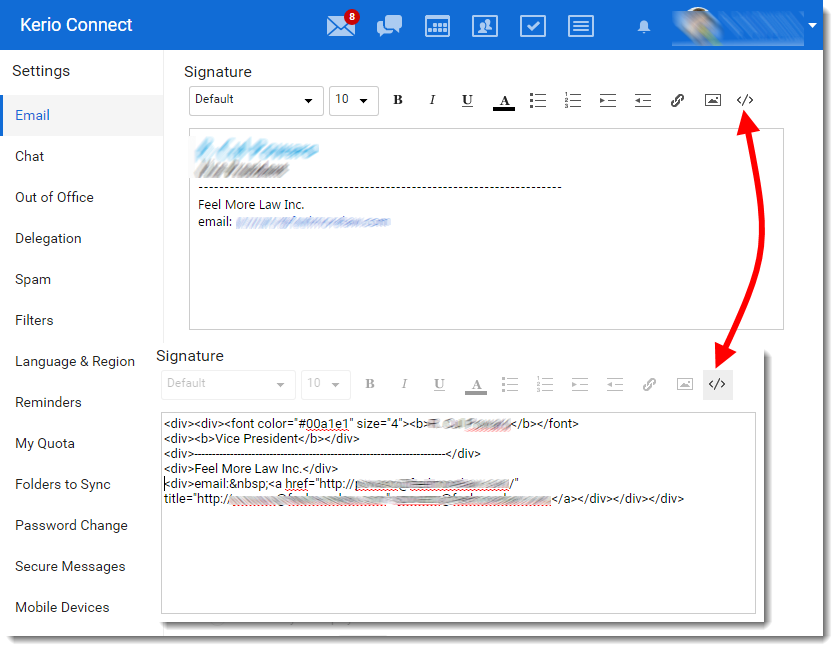
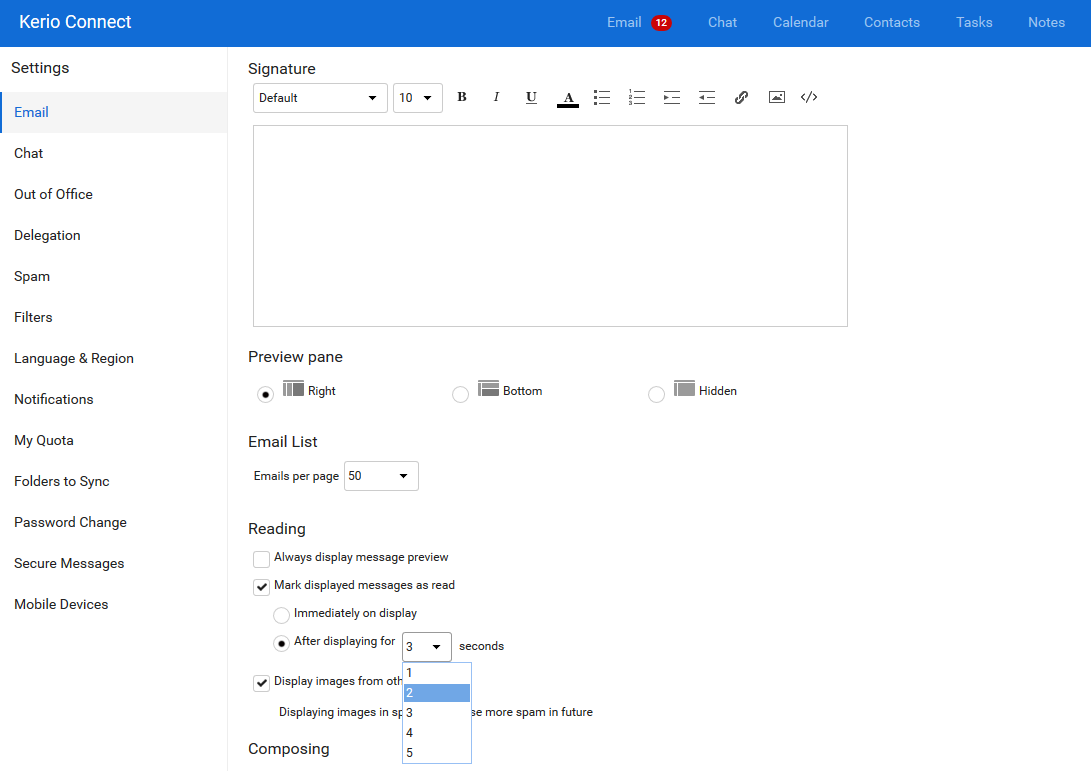
- Go to Email > Signature.
- Type whatever text you want at the end of your messages. You can also use HTML code instead of plain text. The maximum length of the signature is 4095 ASCII characters.
NOTE: New in Kerio Connect 9.1! You can insert images directly in your signature. Kerio Connect Client displays the images in their original size.
-
Click Save at the bottom.
NOTE: If you reply to a message, Kerio Connect Client places your signature directly under your reply.
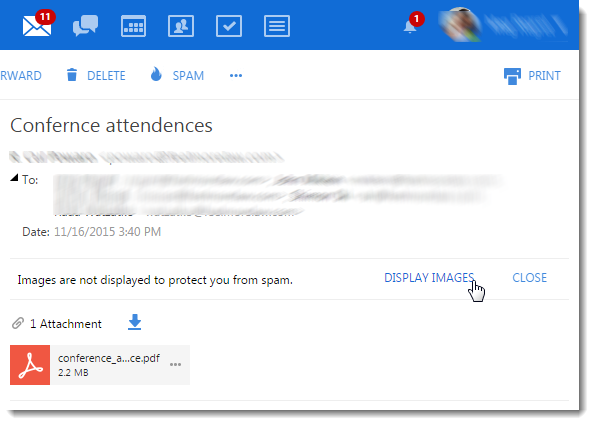
Hiding Images from External Sites
Kerio Connect Client hides all images from external sites in your emails. To display them manually, click Display images under your message header.
To display messages automatically:
- Click Tools > Settings (in Windows Client), or Kerio Connect > Settings (in Mac Client), or your name > Settings (in Web Client).
- Click your name in Kerio Connect Client and select Settings.
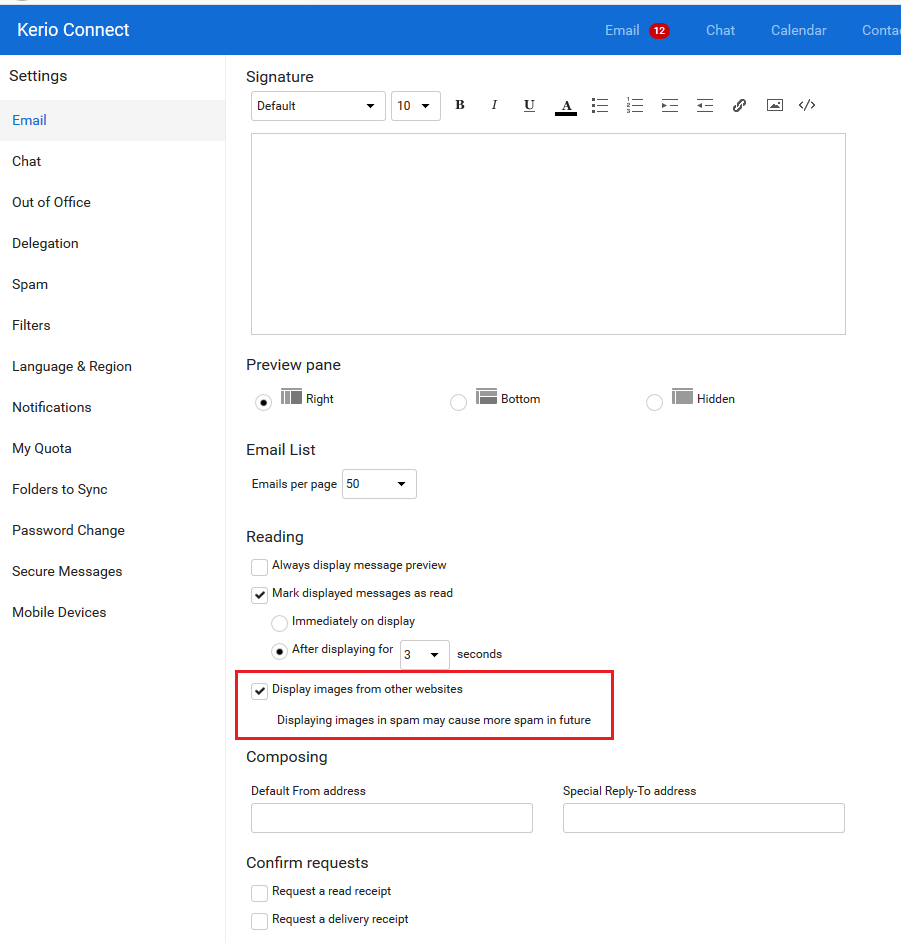
- Go to Email > Reading.
- Select Display images from other websites.
- Click Save.
Specifying the Number of Displayed Messages
NOTE: New in Kerio Connect Client 9.1! You can specify how many messages Kerio Connect Client displays on a single page.
- Click Tools > Settings (in Windows Client), or Kerio Connect > Settings (in Mac Client), or your name > Settings (in Web Client).
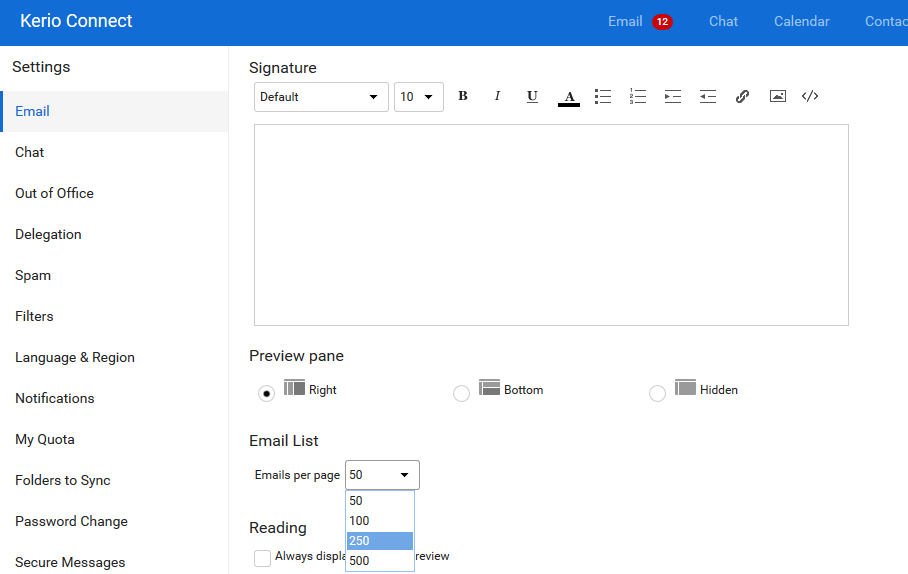
- Go to Email > Email List.
- Select the number from the Emails per page drop-down list.
- Click Save.
Setting Messages as Read
You can specify the time interval after which each message is marked as read.
- Click Tools > Settings (in Windows Client), or Kerio Connect > Settings (in Mac Client), or your name > Settings (in Web Client).
- Go to Email > Reading.
- Check the Mark displayed messages as read option and select Immediately or set the time interval.
- Click Save.
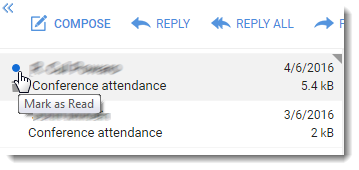
You can also manually mark messages as read by clicking the colored dot next to each message.
Setting the Language
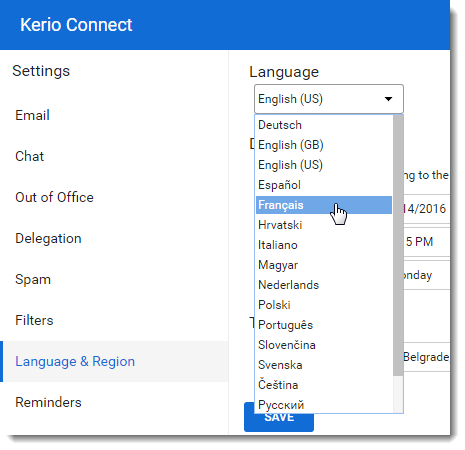
The Kerio Connect Client interface is available in Chinese, Croatian, Czech, Dutch, English (US and UK), French, German, Hungarian, Italian, Japanese, Polish, Portuguese, Russian, Slovak, Spanish, and Swedish.
All items, such as messages, contacts, events, and tasks, in all folder types, are sorted by the alphabet of the selected language.
NOTE: You can also add your own languages. For more information, refer to the Translating Kerio Connect Client to a new language article.
To select a language:
- Click Tools > Settings (in Windows Client), or Kerio Connect > Settings (in Mac Client), or your name > Settings (in Web Client).
- In the Language & Region section, select your preferred language.
- Save your settings.
Configuring the Time Display
Time settings are essential for displaying the correct time when sending and receiving messages.
By default, time zone settings are based on the Kerio Connect server. If you are in a different time zone, you can change the time settings.

Selecting Time Zones
- Click Tools > Settings (in Windows Client), or Kerio Connect > Settings (in Mac Client), or your name > Settings (in Web Client).
- In the Language & Region section, select your preferred time zone.
- Save your settings.
Changing the Time Format
Time is displayed according to your selected language. You may want to use different settings (e.g., you want to display the Kerio Connect Client in French and use English (US) for the date format).
- Click your name in Kerio Connect Client and select Settings.
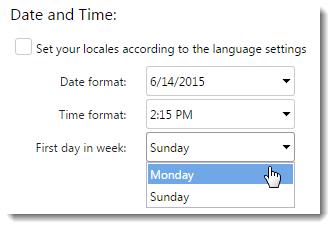
- In the Language & Region section, unselect the Set your locales according to the language settings.
- Select the date and time formats and the first day of the week.
- Save your settings.
Setting Email Addresses
In Kerio Connect Client, you can set the address that is displayed on your outgoing messages and the address that replies come to.
- Click Tools > Settings (in Windows Client), or Kerio Connect > Settings (in Mac Client), or your name > Settings (in Web Client).
- Go to the Email > Composing section.
- Enter your email address in the Default From address and Special Reply-To address fields.
- Click Save. Now, when you compose a message, you can select the From address from a drop-down menu.


NOTE: The Default From address and Special Reply-To apply to emails only. Calendar invites do not benefit from this functionality.
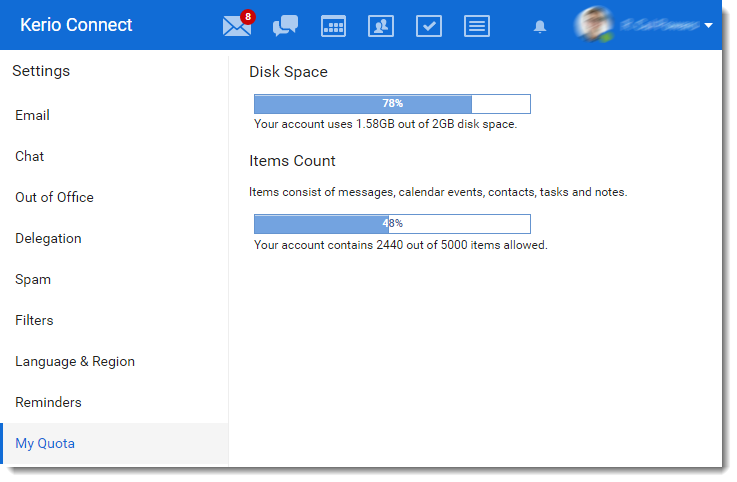
Displaying Account Quotas
If you receive messages with large attachments or have a substantial amount of contacts, you may soon use up the quotas assigned for your account.
The limitations include:
- Space available for your messages.
- The number of items allowed.
To display the amount of available space:
- Click Tools > Settings (in Windows Client), or Kerio Connect > Settings (in Mac Client), or your name > Settings (in Web Client).
- Go to the My Quota section.
- There you can see how much space your account is currently using, how many items you have, and what your limitations are.
What to Do When Your Quota Fills Up
You will not be able to receive new messages if you reach any of the limits set for your account.
Once you reach 90% of a quota, a warning message is displayed in the top bar of Kerio Connect Client.

To solve this problem, we recommend the following:
- Delete any unneeded messages in the Sent and Trash folders.
- Delete any other messages you do not need, especially ones with large attachments.
- Ask your administrator to turn on the automatic items clean-out. This automatically deletes old messages and messages from the trash.
- Ask your administrator to add some space for your account.
Related Articles
- Kerio Connect Client Overview
- Installing Kerio Connect Client on Windows
- Installing and Configuring Kerio Connect Client on MacOS
Configuring several additional settings is covered in other articles:
- Colors (theme)
- Message preview
- Out of Office message
- Delegation
- Whitelist email address
- Email filters
- Notifications for new messages and event/task reminders
- Folders to be synced to mobile devices
- Send signed and encrypted messages
- Manage and reset your mobile devices
- Hide/display the folder tree
- Configure Click to Call (if available)
Priyanka Bhotika
Comments