Overview
Users can create and edit their email contacts. This article describes the steps to:
- Create Contacts from the Contacts Section
- Create Contacts from Email Messages
- Edit Existing Contacts
Note: If you send or receive emails from an address that is not in your Contacts, the address is saved automatically by the client. Such addresses are not visible in your Contacts. However, when you compose a message, these addresses are offered to you along with addresses from your contacts.
Process
Creating Contacts from the Contacts Section
- In Kerio Connect Client, go to the Contacts section.
- Click New Contact.
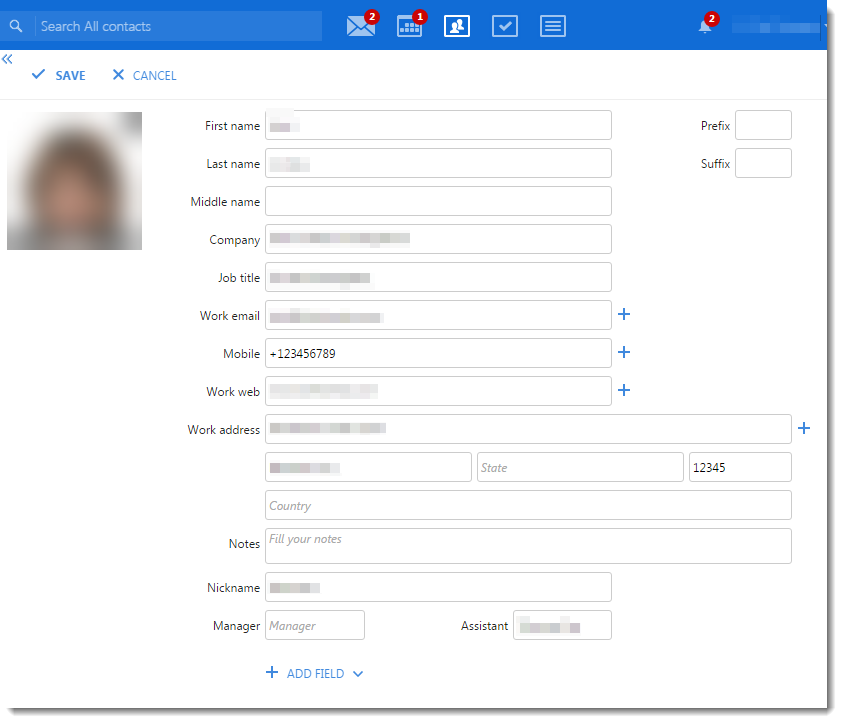
- Enter the contact information.
- Click Add Field to add additional information.
Also, you can click on the plus sign to add a specific field (e.g., Home email).
- Click Upload photo and select the appropriate file.
Note: The image file must be in the JPG format and cannot exceed 256 KBs. - Click Save.
Note: If you synchronize your Kerio Connect account with an Exchange ActiveSync device, keep in mind that:
- Only the first three email addresses are synchronized.
- The types of email addresses do not synchronize (e.g., work email, home email).


Creating Contacts from Email Messages
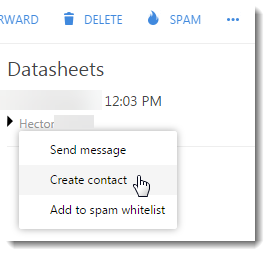
You can create or update contacts directly from the messages you receive.
- Choose a message in Kerio Connect Client.
- Click on any name or email address in the message header.
- Click Create contact.
Note: If the contact already exists, the Update contact option is displayed instead.
Editing Existing Contacts
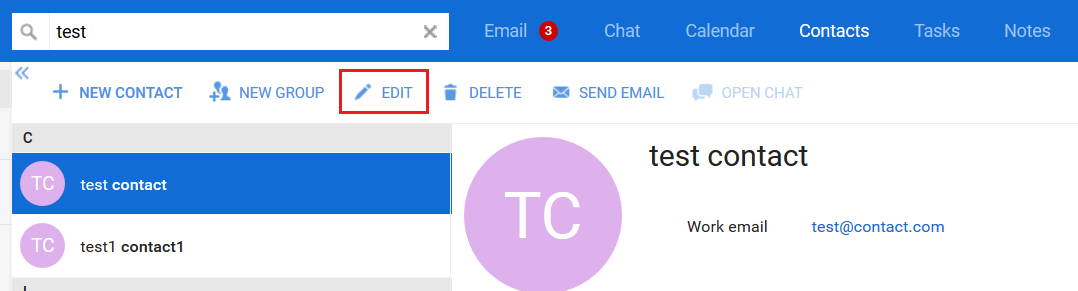
- Open Contacts and locate the necessary contact card.
- Click Edit.
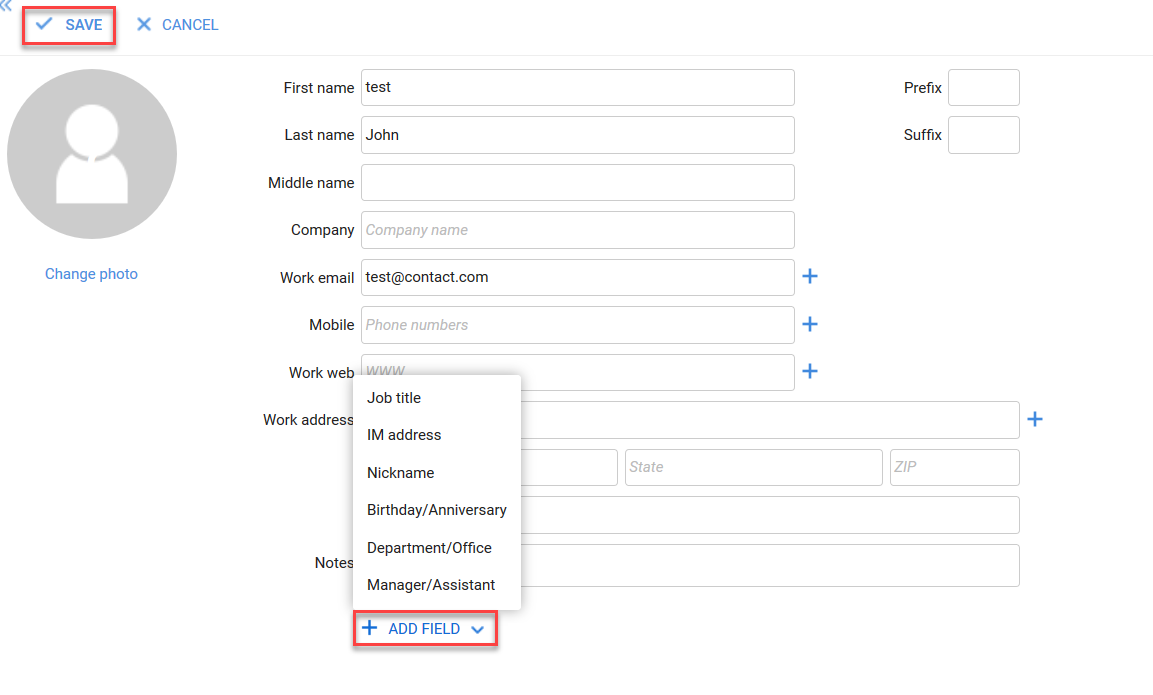
- Update the necessary information and click Save.
You can add additional information by clicking Add Field and selecting the necessary option.
- Click Save.
Priyanka Bhotika
Comments