Overview
This article provide the procedure for using the Import/Export Tool to import mail from .PST files in to the GFI Archiver Archive Stores
Prerequisites
If Microsoft Outlook is not detected on the machine where the tool is running, import from PST and download to PST features are disabled.
Solution
General Process Flow
Below is a high level overview of the steps that occur to process mail from the .PST file when being copied to the GFI Archiver Archive Stores.
- The Import Export Tool extracts emails from one or more PST files.
- The Import Export Tool converts the emails to MIME format.
- The GFI Archiver Import Service processes the extracted emails based on the date of each email.
- GFI Archiver stores emails in the appropriate archive store.
Step by Step Process Guide
-
Importing Emails from a Remote Computer
- Refer to the link above when extracting items from a mailbox on a remote machine. If importing emails from the same machine where GFI Archiver is installed, skip this step.
-
Running the GFI Archiver Import/Export Tool
- Launch the Import/Export tool by going to Start > Programs > GFI Archiver > GFI Archiver Import/Export Tool.
- Click Import from .pst files.
-
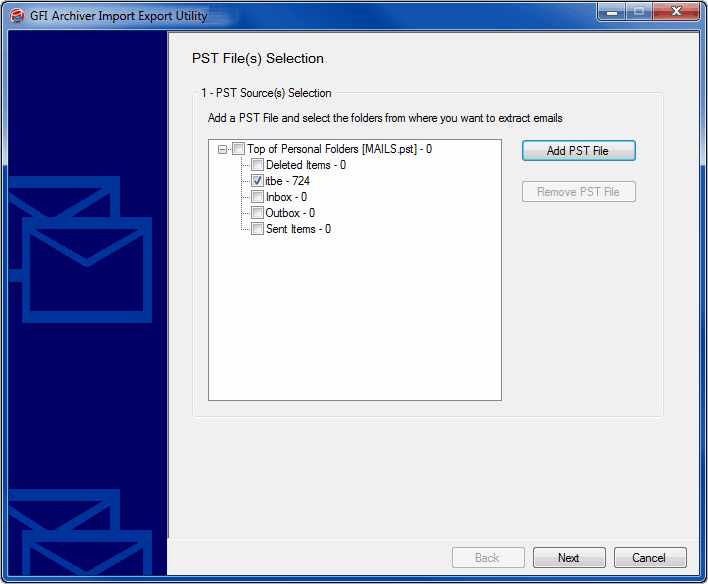
Click Add PST File and select a PST file to extract. Repeat for each PST file to be added.
-
Click Next when all PST files are added.
-
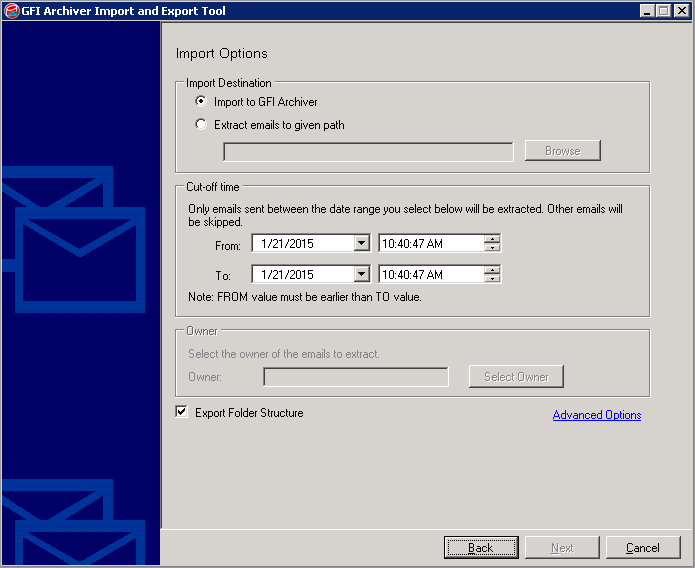
From Import destination area, select one of the following options:
- Import to GFI Archiver – import items to GFI Archiver Archive Stores.
- Extract emails to given path – extract items to a location on disk in .txt format.
-
In the Cut-off time area, specify a date range. Emails and calendar items that fall between the specified dates are extracted, all others are ignored.
-
In the Owner area, enable Select the owner of the emails to extract and specify the user in the Owner text box.
Example: If
user@testdomain.comis specified in the Owner field, imported items are displayed underuser@testdomain.com. -
Click Next to start the export process.
-
When the process completes, click Finish.
NOTE
The duration of the process depends on the amount of items to extract.
Testing
After performing an Import of the mails from the .PST Files users should be able to view the imported mail by navigating to the Archiver Console > Archive tab and view mail for users they have access to.
Related Articles
Setting Permissions for Importing Emails from Microsoft Exchange via Import/Export Tool
Setting Permissions for GFI Archiver in Microsoft Office 365 Using EWS
Using GFI Archiver Import/Export Tool for Importing Emails from Microsoft Exchange Mailboxes
Priyanka Bhotika
Comments