Overview
The Vulnerability Assessment Options tab enables you to configure which Microsoft or non-Microsoft and Security or non-Security updates are checked when scanning targets with the selected profile.
This article guides you on how to set up and configure Vulnerability Scanning.
Process
- Enabling Vulnerability Scanning
- Customizing the List of Vulnerabilities to Be Scanned
- Customizing Vulnerability Checks Properties
- Setting up Vulnerability Check Conditions
Enabling Vulnerability Scanning
- Launch GFI LanGuard.
- Go to Configuration > Scanning Profile Editor. Alternatively, press CTRL + P to launch the Scanning Profiles Editor.
- Go to Vulnerability Assessment Options > Vulnerabilities.
- Select the scanning profile to customize from the left pane under Profiles.
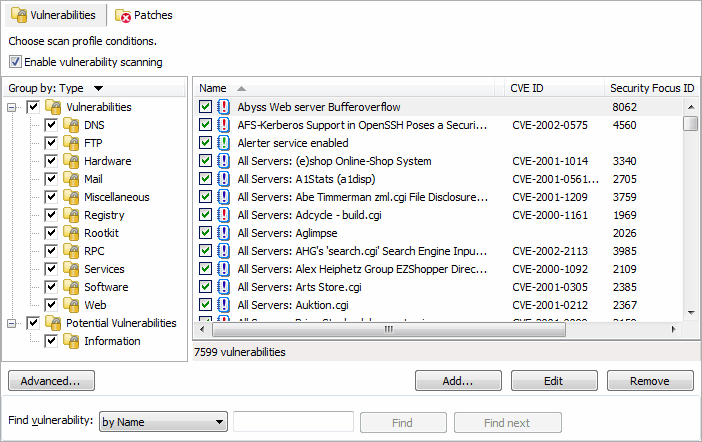
- In the right pane, select Enable Vulnerability Scanning.
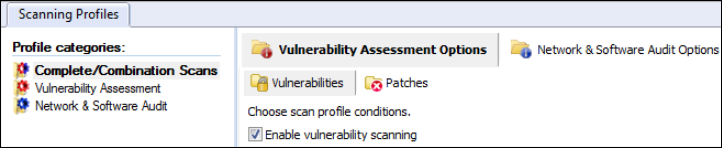
NOTE: Vulnerability scanning is configured on a scan profile by scan profile basis. If in a particular profile this option is not selected, no vulnerability tests will be performed in the security audits carried out by this scanning profile.
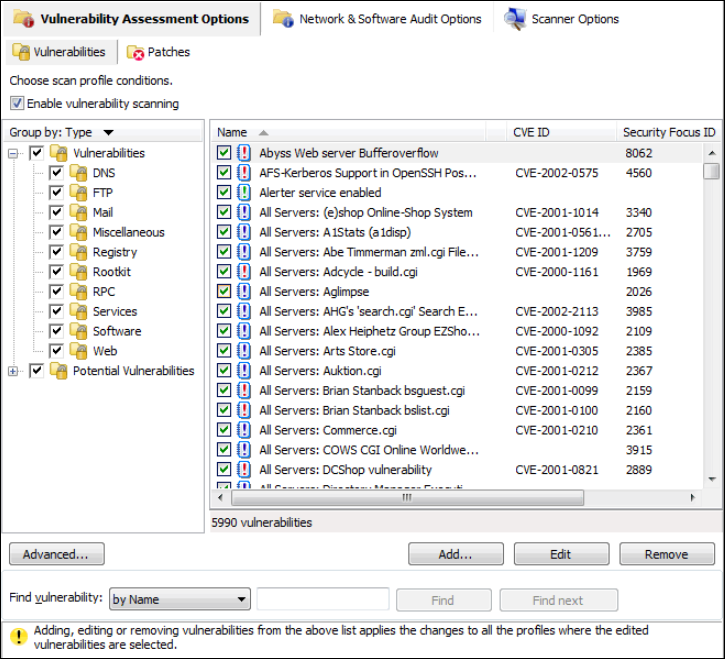
Customizing the List of Vulnerabilities to Be Scanned
Specify which vulnerabilities will be enumerated and processed by a scanning profile during a security audit:
- Launch GFI LanGuard.
- Go to Configuration > Scanning Profile Editor. Alternatively, press CTRL + P to launch the Scanning Profiles Editor.
- Go to Vulnerability Assessment Options and select the scanning profile to customize from the left pane under Profiles.
- In the right pane, select the vulnerability checks to execute through this scanning profile.
Customizing Vulnerability Checks Properties
All the checks listed in the Vulnerabilities tab have specific properties that determine when the check is triggered and what details will be enumerated during a scan.
- Right-click on the vulnerability to customize, select Properties.
- Customize the selected vulnerability check from the tabs described below:
Tab
Description
General
Use this tab to customize the general details of a vulnerability check including vulnerability check name, vulnerability type, OS family, OS version, product, timestamp, and severity.
Conditions
Use this tab to configure the operational parameters of this vulnerability check. These parameters will define whether a vulnerability check is successful or not.
Description
Use this tab to customize the vulnerability check description.
References
Use this tab to customize references and links that lead to relevant information in the OVAL, CVE, MS Security, Security Focus and SANS TOP 20 reports.
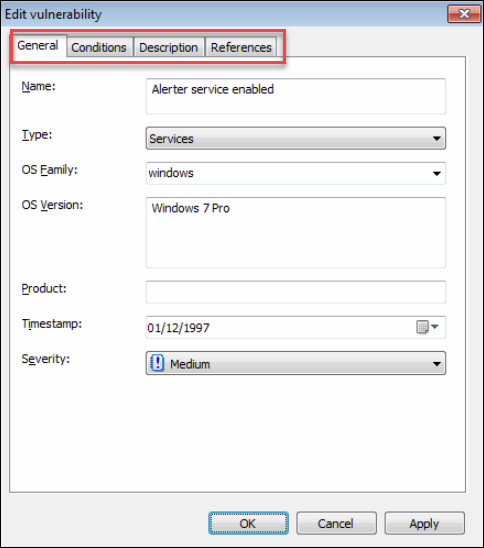
- Click OK to save your settings.
Setting up Vulnerability Check Conditions
The Conditions tab enables you to add or customize conditions, which define whether the computer or network being scanned is vulnerable, or not.
WARNING: It is therefore of paramount importance that any custom checks defined in this section are set-up by qualified personnel that is aware of the ramifications of their actions.
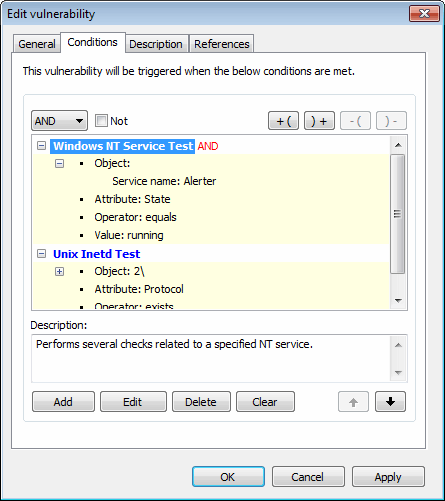
To add a vulnerability check condition:
- Launch GFI LanGuard.
- Go to Vulnerability Assessment Options > Vulnerabilities.
- Right-click a vulnerability from the list of vulnerabilities and select Properties.
- From the Edit Vulnerability dialog, go to Conditions > Add.
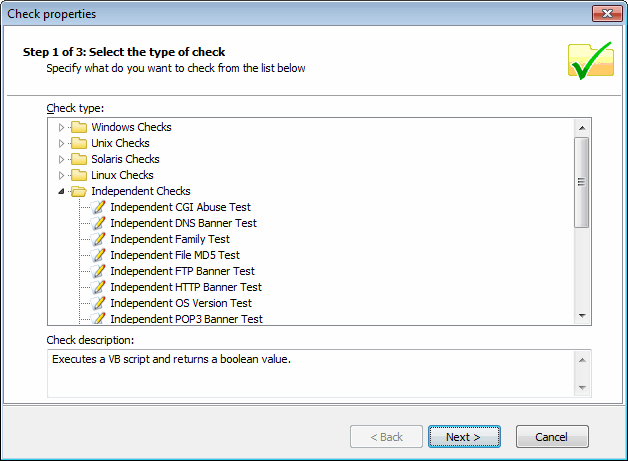
- Select the type of check to be configured and click Next.
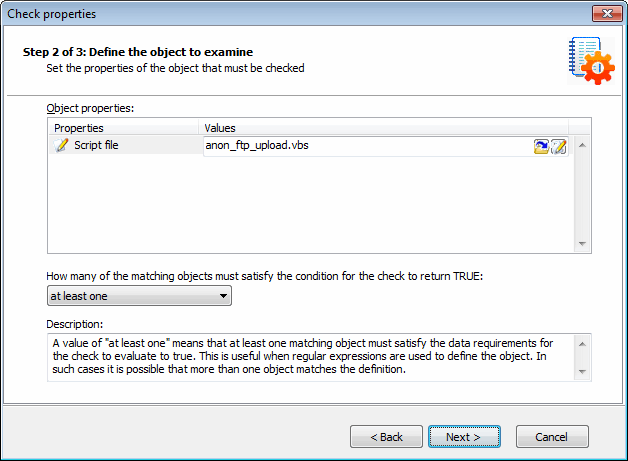
- Define the object to examine and click Next.
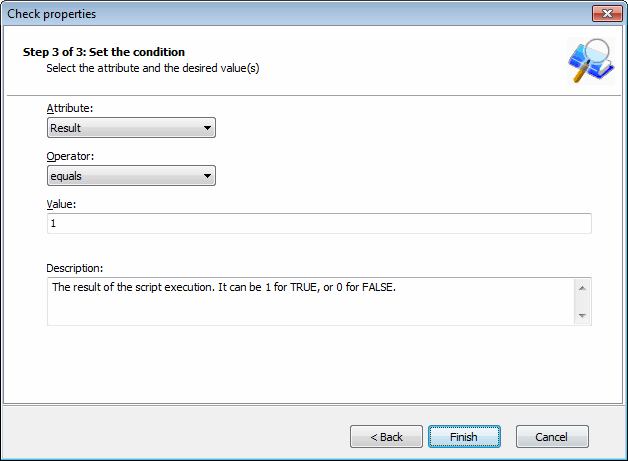
- Specify required conditions and click Finish to finalize your settings.
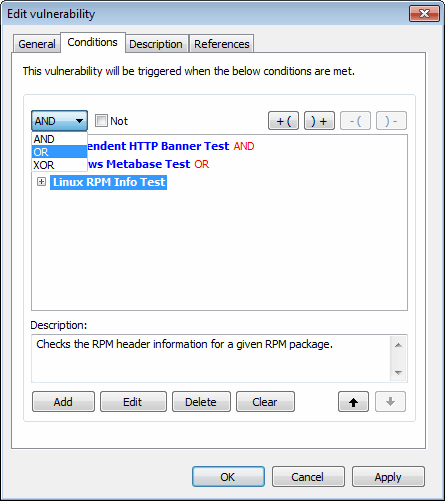
- If more than one condition is set up, define conditional operators and click OK to finalize your configuration settings.
- (Optional) Click Advanced in the Vulnerabilities tab to launch the advanced vulnerabilities scanning options.
The options in Advanced Vulnerabilities Options are used to:
- Configure extended vulnerability scanning features that check your target computers for weak passwords, anonymous FTP access, and unused user accounts.
- Configure how GFI LanGuard handles newly created vulnerability checks.
- Configure GFI LanGuard to send CGI (Common Gateway Interface) requests through a specific proxy server. This is mandatory when CGI requests will be sent from a computer that is behind a firewall to a target web server that is outside the firewall. For example, Web servers on a DMZ (Demilitarized Zone).
The firewall will generally block all the CGI requests that are directly sent by GFI LanGuard to a target computer that is in front of the firewall. To avoid this, set the Send CGI Requests Through Proxy option to Yes and specify the name/IP address of your proxy server and the communication port which will be used to convey the CGI request to the target.
Related Articles
- Creating a New Scanning Profile in GFI LanGuard
- Configuring Patches in GFI LanGuard
- Configuring TCP/UDP Port Scanning Options in GFI LanGuard
- Configuring System Information Options in GFI LanGuard
- Configuring Device Scanning Options in GFI LanGuard
- Configuring Applications Scanning Options in GFI LanGuard
Priyanka Bhotika
Comments