Overview
It might be necessary to connect to a Kerio Control hardware appliance using a serial console. This is useful when network access breaks with the hardware appliance due to configuration mistakes or network hardware issues (from the box or network switch side), you need direct access to the Linux shell or BIOS, you need to view the boot sequence from the hardware appliance.
Prerequisites
Connection Settings
When setting up communication through a serial console, the connection requires these settings:
- Speed:
9600 - Data bits:
8 - Stop bit:
1 - Parity: none
- Flow control: none
When accessing BIOS, the connection requires these settings:
- Speed:
115200 - Data bits:
8 - Stop bit:
1 - Parity: none
- Flow control: none
Process
Windows
Connecting to the Kerio Control hardware appliance using Windows requires using a special application such as PuTTY or RealTerm. Here are the steps for using RealTerm:
- Install RealTerm on your computer.
- Attach the serial cable to the hardware appliance and your PC.
- Run RealTerm.
- On the Display tab, select ANSI.
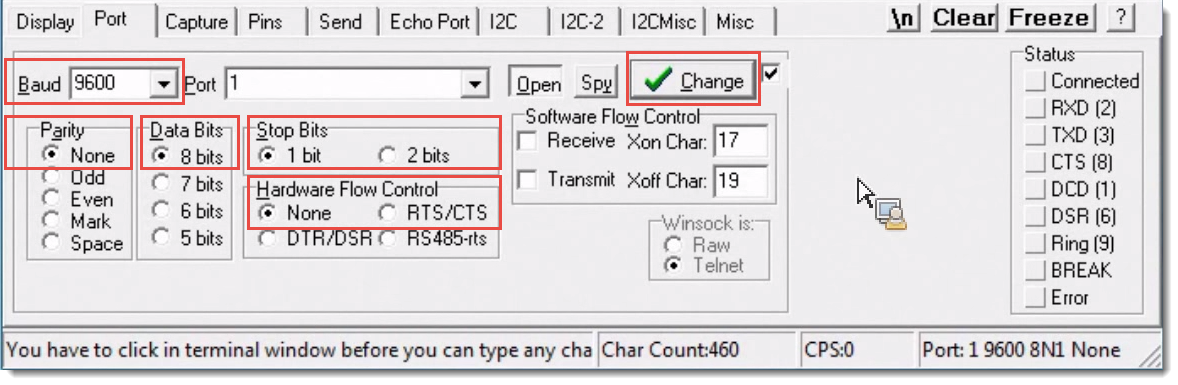
- Click the Port tab and make the following selections there:
- Baud:
9600 - Parity: none
- Data bits:
8 - Stop bit:
1 - Hardware Flow Control: none
- Baud:
- Click Change.
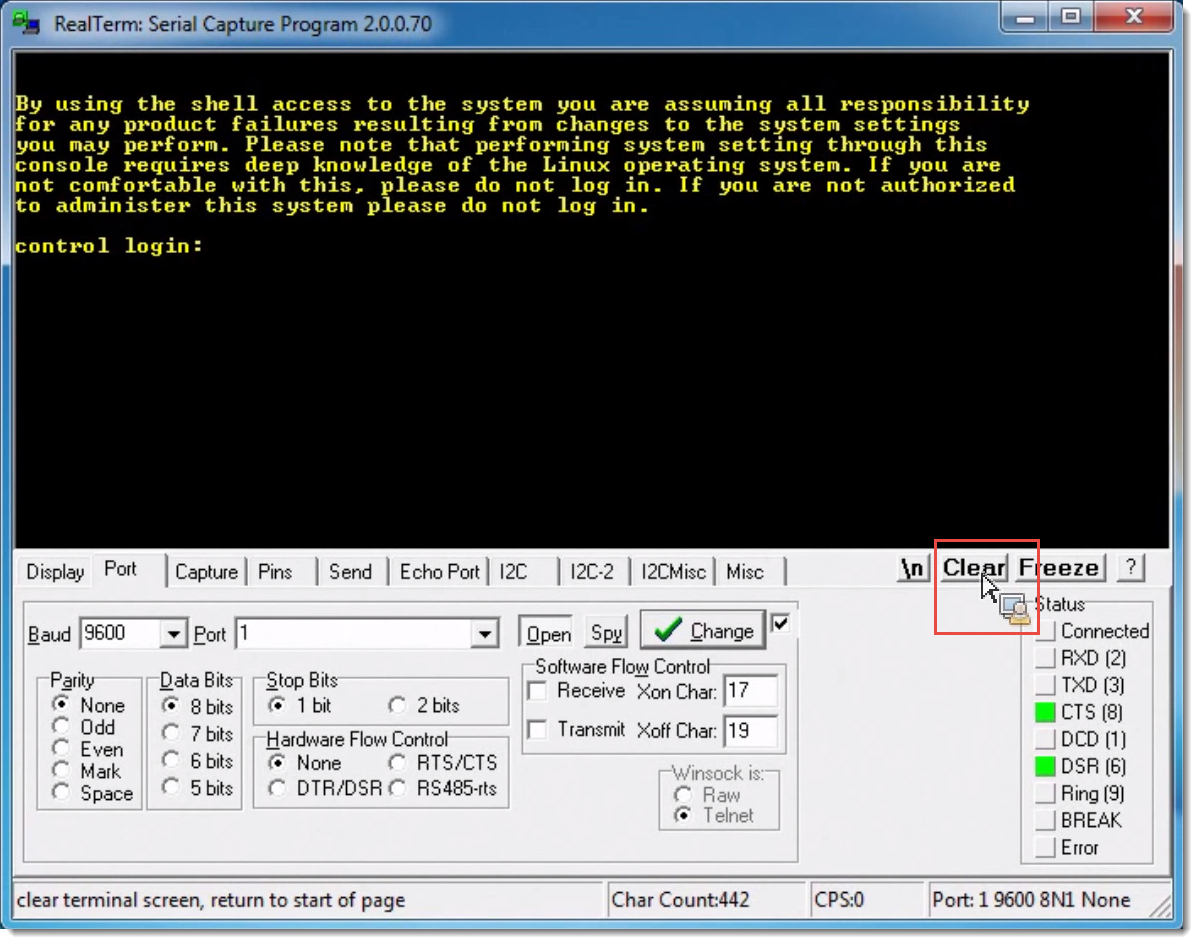
- Before logging on to your hardware device, click Clear.
- Log into your hardware device as root. Use the admin password for verification.
Linux
Connecting to the Kerio Control hardware appliance using Linux requires using a special terminal software such as minicom. Here are the steps for using minicom:
- Install the minicom application.
- Type the following command at the shell prompt:
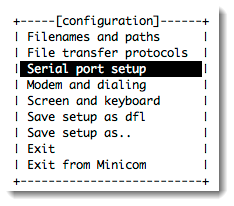
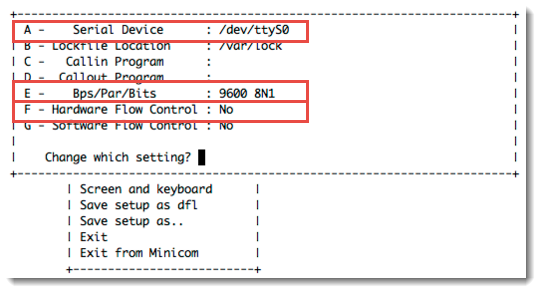
$minicom -s - In the menu, select Serial port setup.
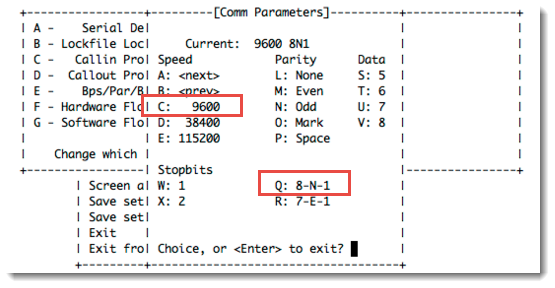
- Type
A. - In the A section, type the interface:
TTYS0. If you use a USB-to-serial adapter, select USB instead. - Press Enter.
- Type
E. - In the E section, type
CQfor the following settings:C: 9600 (Baudrate)Q: 8 (Data Bits)-N (Parity as none)-1 (Stop Bit)
- Press Enter.
- Type
Fand set it toNo. - Press Enter to save the configuration as highlighted below:
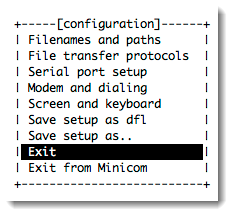
- Return to the main menu.
- Select Exit.
- Log in to your hardware device as root. Use the admin password for verification.
macOS
Connecting to the Kerio Control hardware appliance using Linux requires:
- USB to Serial adapter with the FTDI chipset directly supported by macOS.
- Special terminal software such as CoolTerm.
Here are the steps for using CoolTerm:
- Put the serial cable to the hardware appliance and also to your Mac with the USB to Serial adapter.
- Open CoolTerm.
- In the Serial Port section, select the USB adapter as the port with the following settings:
- Baudrate:
9600 - Data Bits:
8 - Parity: none
- Stop Bits:
1 - Flow Control: no selection
- Baudrate:
- Click Connect.
- Log in to your hardware device as root. Use the admin password for verification.
Priyanka Bhotika
Comments